Kitchen Counter Organization: How to Keep Prep Space Clear
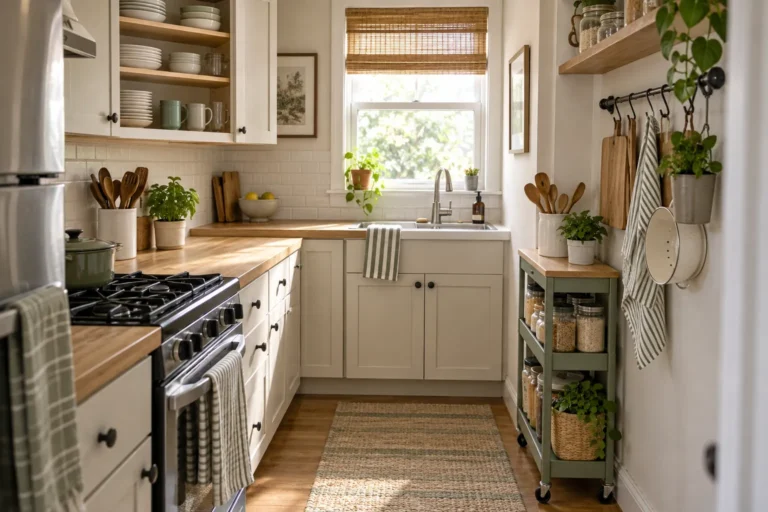
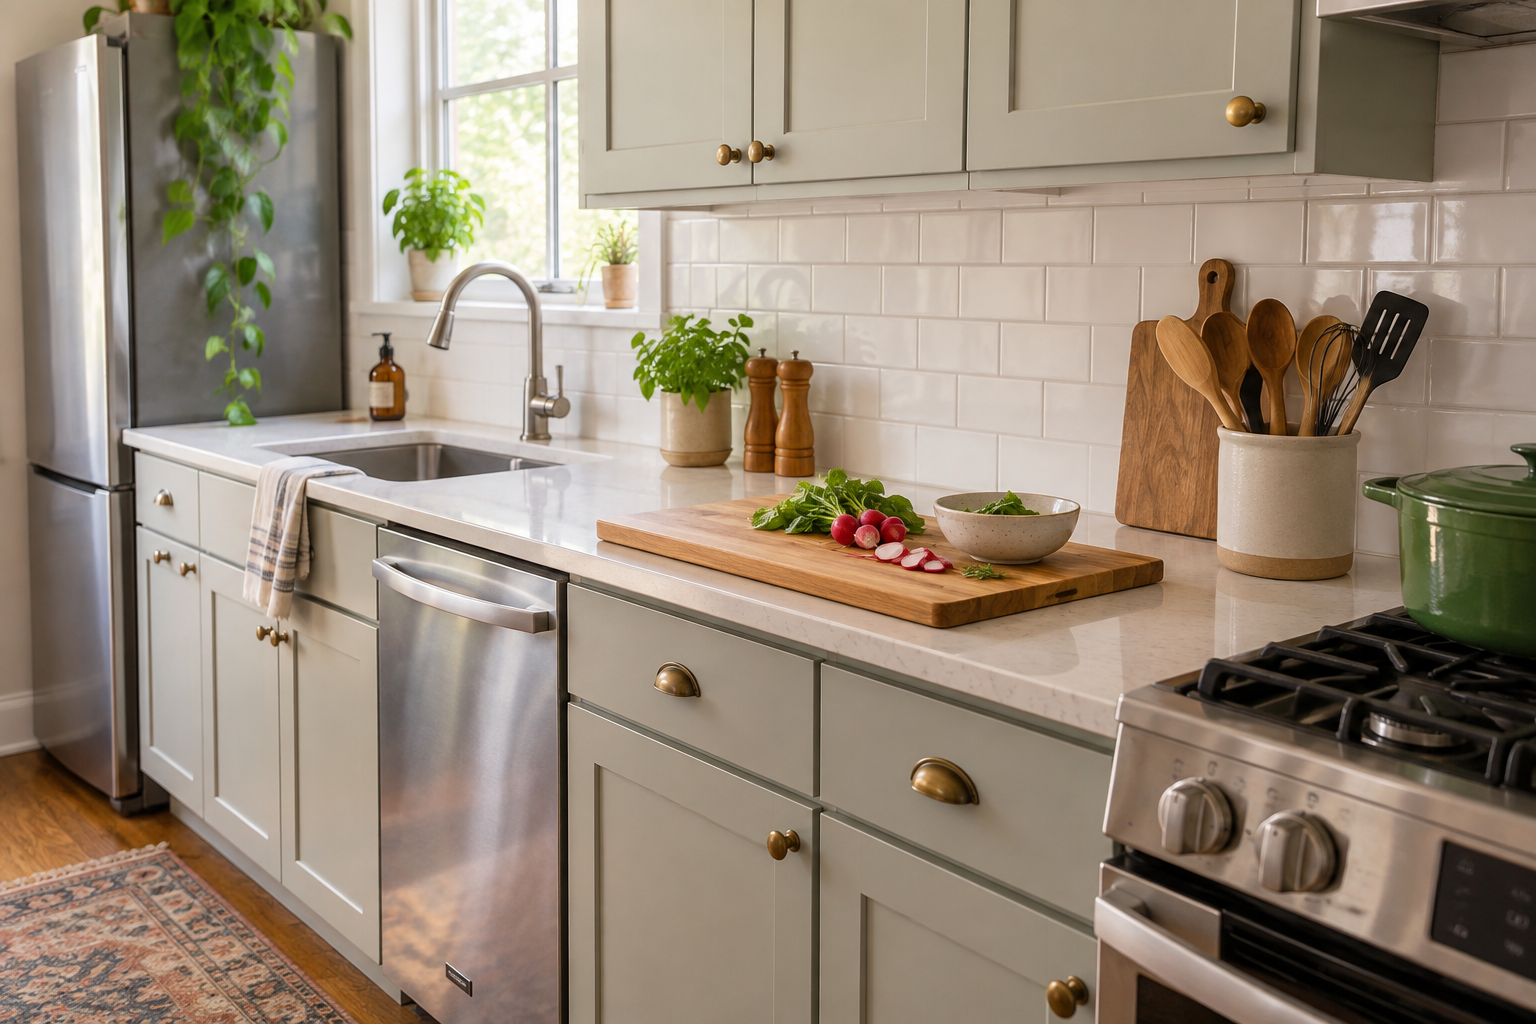
A small kitchen counter has two jobs that constantly compete with each other: it needs to hold a few useful things, and it needs to stay open enough for actual work.
That is why the usual advice to “clear the counters,” “make zones,” or “keep only daily-use items out” only gets you so far. Those tips can make a kitchen look tidier, but they do not answer the harder question: how much counter should stay free, and which items deserve to occupy the rest?
If you are trying to figure out how to organize kitchen counter space in a small kitchen, start with the work surface, not the storage products. First, reserve the counter area you genuinely need for food prep and everyday kitchen tasks. Then make every permanent counter item justify the space, access, and cleanup burden it creates.
This guide uses two practical OrganizeSmartly decision tools:
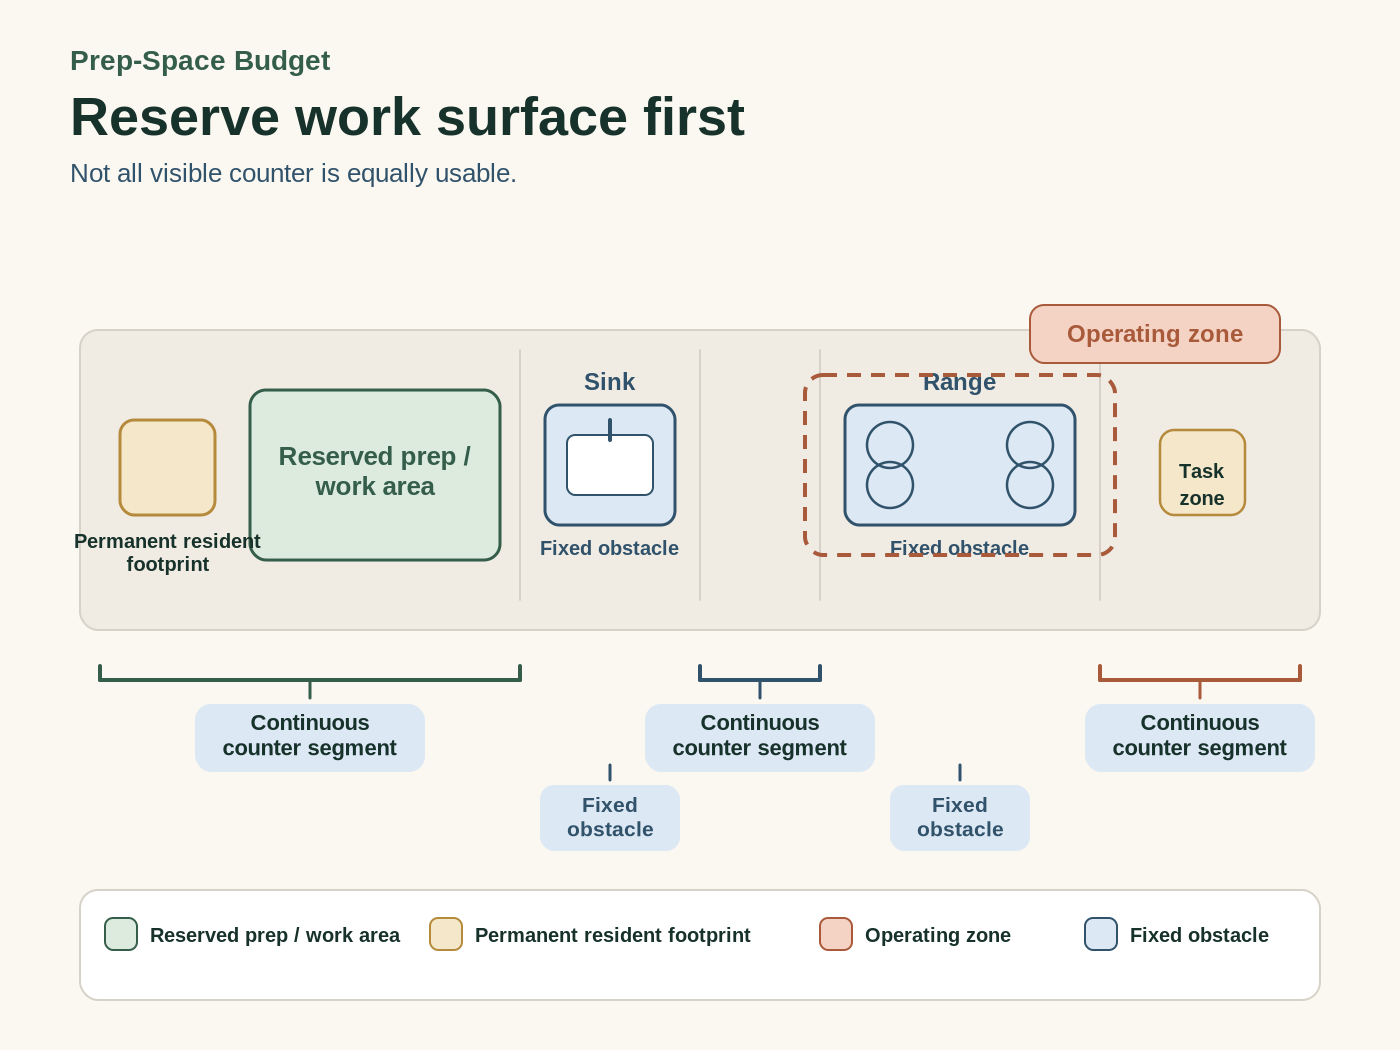
Prep-Space Budget: map your usable counter segments and reserve the best work surface before assigning storage.
Counter Residency Test: decide whether each item should stay permanently, live near a task zone, move as a contained unit, or be stored elsewhere.
These are not scientific scoring systems or universal rules. They are a way to make better decisions in a kitchen where every inch is doing several jobs.
For broader whole-kitchen ideas, see our small kitchen organization guide.
In This Guide
- Why Small-Kitchen Counters Disappear So Fast
- Step 1: Map Your Prep-Space Budget
- Step 2: Measure What Permanent Items Really Cost
- Step 3: Run the Counter Residency Test
- Step 4: Decide Common Counter Categories One by One
- Step 5: Route Items That Do Not Earn Permanent Counter Space
- Step 6: Only Then Decide Whether You Need an Organizer
- Step 7: Test the Setup During a Normal Meal and Cleanup
- Common Kitchen Counter Organization Mistakes
- Frequently Asked Questions
Affiliate disclosure: This guide contains affiliate links. As an Amazon Associate I earn from qualifying purchases. We recommend products based on problem-solution fit, dimensions, compatibility, and practical usefulness. Read the disclosure.
Why Small-Kitchen Counters Disappear So Fast
Storage and prep are competing for the same inches
In a large kitchen, a toaster, coffee maker, fruit bowl, utensil crock, drying rack, oil bottle, and mail pile might occupy separate areas without destroying the main work zone.
In a small kitchen, those same objects can consume most of the only continuous counter run.
That matters because total counter area is less useful than usable counter area. A narrow strip beside the range, a corner blocked by an appliance lid, and a short section beside the sink may technically add up to several feet of countertop, but they do not function like one uninterrupted prep surface.
This is the first shift to make: stop treating every visible inch as interchangeable storage space.
Convenience can create permanent clutter
Items often earn a permanent counter spot for one reason: “I use it.”
But almost everything in a kitchen gets used eventually. The better question is whether the item needs to live on the counter between uses.
A coffee maker used every morning may justify staying near an outlet. A blender used occasionally may not. A utensil container may be convenient beside the range, but if it crowds the only place where you chop vegetables, the convenience is costing you work surface every day.
The point is not to hide everything. It is to notice the tradeoff.
Why “keep only daily items” is not enough
Frequency matters, but it cannot make the decision alone.
An item can be used daily and still be a poor permanent resident if it has a large footprint, blocks an upper-cabinet door, needs to be pulled forward before use, leaves no room for a cutting board, or makes the counter annoying to clean.
The reverse can also be true. A heavier appliance used a few times a week may reasonably stay out if moving it from a low cabinet every time would make the kitchen harder to use.
That is why this system considers frequency alongside location, footprint, movement, operating needs, and cleanup.
Step 1: Map Your Prep-Space Budget
Before buying a rack, tray, shelf, or organizer, make a quick map of the counter you already have.
The goal is not to calculate a perfect percentage. It is to identify which surface is most valuable for actual kitchen work and protect it before clutter claims it by default.
Break the counter into continuous usable segments
Walk from one end of the kitchen to the other and treat each uninterrupted counter run as its own segment.
A sink, range, built-in appliance, wall return, or structural break separates one segment from another. Corners may also function differently from straight runs because they can be harder to reach or partially blocked by upper cabinets.
For each segment, note:
- approximate width;
- usable depth;
- what fixed feature is beside it;
- whether an upper cabinet, shelf, window, or appliance affects the space above it;
- what you currently use that segment for.
Do not add everything into one grand total yet. A 20-inch section beside the refrigerator and a 20-inch section beside the sink may have completely different practical value.
Mark fixed obstacles and operating areas
Next, mark the parts of each segment that are not truly free.
That can include the swing or opening path of a nearby cabinet door, the area needed to use the faucet comfortably, a countertop appliance that has to open upward or forward, or a location where heat, steam, splash, or manufacturer placement requirements affect what can safely sit there.
You do not need to invent clearance numbers. In fact, do not. The point is to identify that these operating areas exist so you do not mistake them for reliable storage space.
Identify the counter segment you actually prep on
Now ignore how the kitchen is styled and think about how you cook.
Where do you put a cutting board? Where do you set a mixing bowl? Where do groceries land while you unpack them? Where do you plate food or assemble lunch?
That segment is usually more valuable than a counter section used mainly as a parking spot for objects.
As a professional planning reference, the National Kitchen & Bath Association recommends a continuous countertop section at least 36 inches wide by 24 inches deep immediately next to a sink for a primary preparation/work area. That is a design recommendation, not a universal legal minimum for every existing home, and state or local codes may apply. Source: https://kb.nkba.org/uploads/2022/05/Kitchen-Planning-Guidelines.pdf
If your kitchen has less than that, the answer is not to declare the kitchen unusable. It is to identify your best available continuous work segment and protect it as deliberately as possible.
Reserve work surface before making storage zones
This is the actual Prep-Space Budget decision:
- Choose your most functional prep/work segment.
- Reserve it first.
- Treat the remaining counter surface as the budget available for permanent residents.
If an item would force you to move three things before you can use a cutting board, it is spending from the prep budget whether or not it looks organized.
A matching tray does not change that math.
Step 2: Measure What Permanent Items Really Cost
The footprint printed on a product listing is not always the same as the amount of counter space the item consumes in real life.
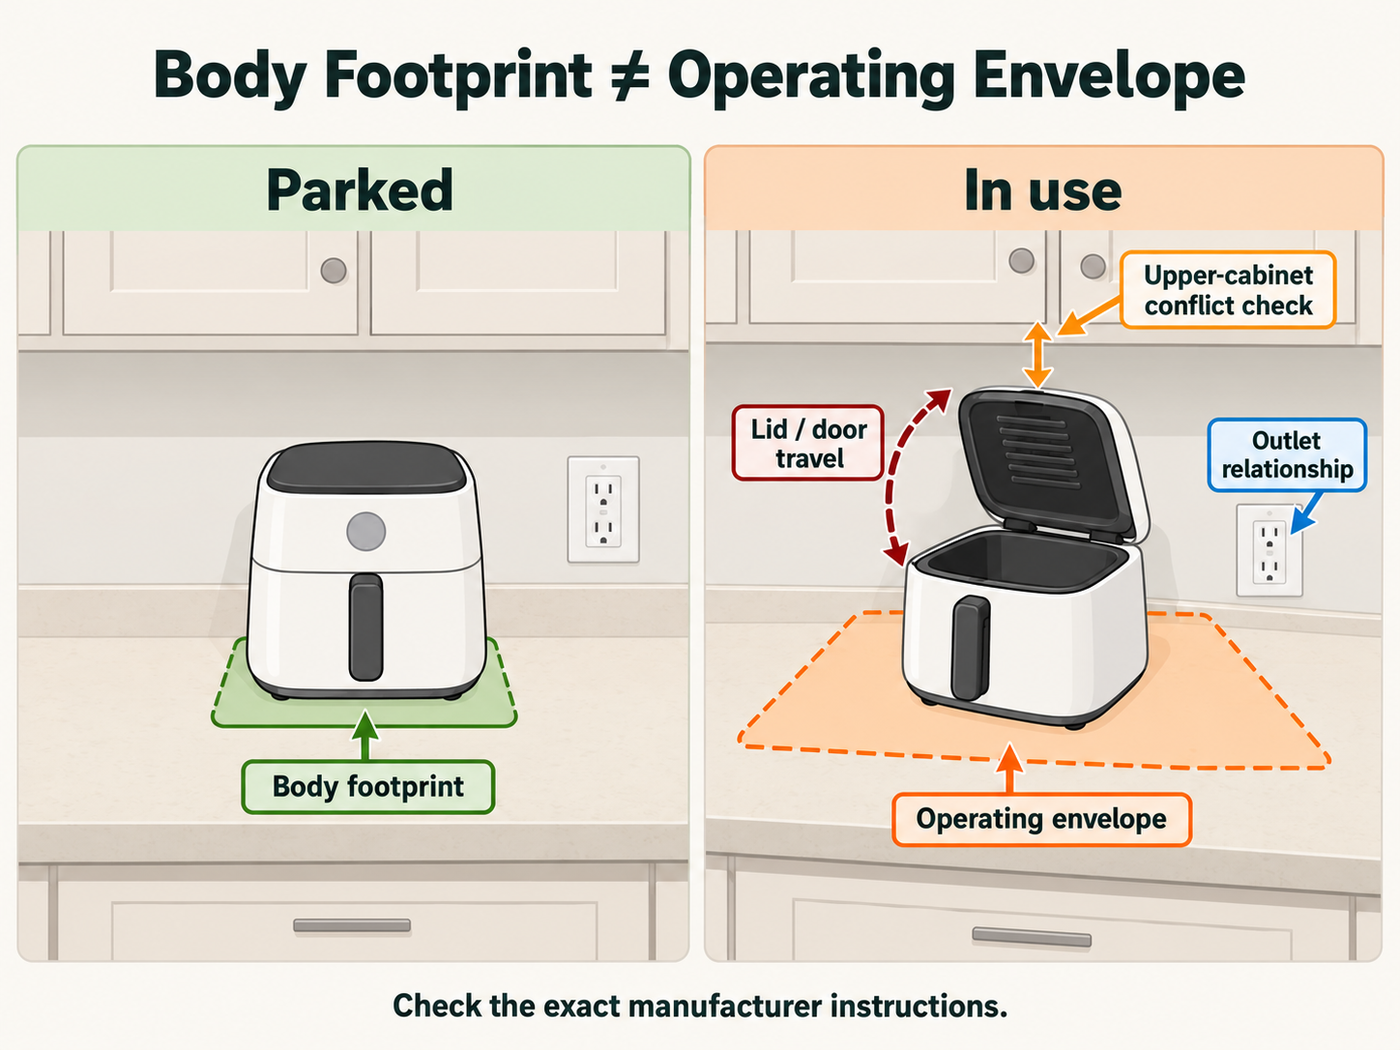
A coffee maker, air fryer, stand mixer, toaster oven, blender, or water appliance may need additional room to open, vent, fill, remove a container, reach a plug, or clear an upper cabinet. Even non-electric items can create a larger working footprint than their body dimensions suggest.
Measure the physical footprint
For any item you are considering leaving out, measure the width and depth of the space it occupies in its normal resting position.
Then compare that footprint with the counter segment it would occupy.
The useful question is not “Does it fit?” It is “What percentage of this specific useful segment disappears when it lives here?”
You do not need a universal threshold. In one kitchen, a 12-inch-wide appliance may be a minor resident. In another, it may consume half of the only practical prep run.
Measure operating space, not just body dimensions
Now place or imagine the item exactly as you would use it.
Does it need to slide forward? Does a lid lift upward? Does a drawer or door open into another object? Do you need space above it to pour in water or ingredients? Do you need room in front to remove a hot or heavy container?
That extra space is the operating envelope.
An appliance that technically fits under a cabinet but cannot be comfortably opened there does not really fit the task.
Check upper-cabinet and door/lid conflicts
Small kitchens often use the same vertical zone twice: countertop below, cabinet above.
That can create conflicts that are easy to miss while measuring only the base footprint.
Open nearby cabinet doors. Lift appliance lids. Pull out removable bowls or baskets. Check whether the permanent location makes another storage area harder to use.
If using one item requires moving another item every time, the arrangement has created a hidden recurring task.
Check outlet and cord reach
Electric appliances also need a realistic relationship with an outlet.
Do not choose a permanent location just because the appliance fits aesthetically. Ask whether the exact appliance can be used there according to its manufacturer instructions, whether the cord reaches appropriately, and whether using it there interferes with other tasks.
This article does not use universal cord, extension, outlet, ventilation, heat, or spacing rules because those can vary by appliance and manufacturer.
Check the manufacturer’s instructions where relevant
For appliances that produce heat, steam, airflow, or moving parts, the exact product manual or official manufacturer documentation should decide any model-specific placement requirements.
Body dimensions are not a substitute for safe operating requirements.
This matters later if you compare organizers or appliance-moving accessories, too. A product can make an appliance easier to slide without automatically making the location appropriate for operation.
Step 3: Run the Counter Residency Test
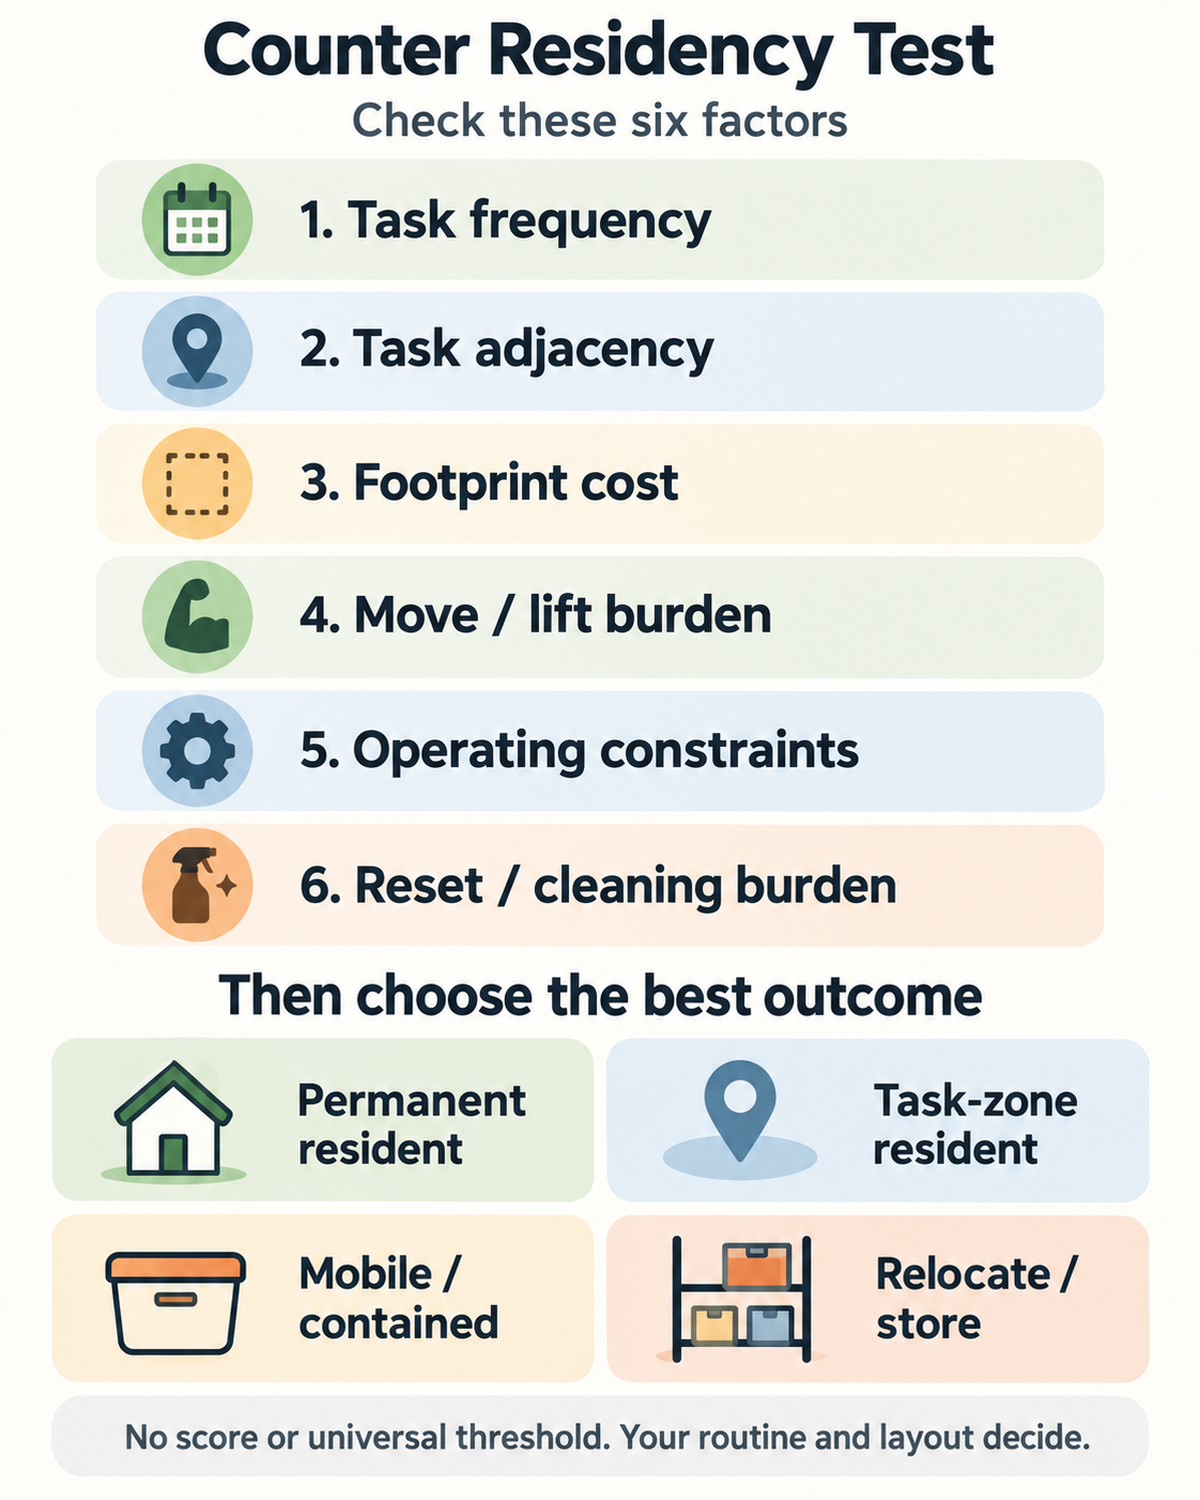
Once you know which counter area you want to protect and what each item really costs, test every proposed permanent resident against six questions.
Do not score them. Use the questions to expose tradeoffs.
1. Task frequency
How often does the item genuinely participate in your normal routine?
“Daily” is useful information, but it is not an automatic permission slip. A frequently used item still has to work with the rest of the kitchen.
2. Task adjacency
Does the item need this exact location, or does it simply need to be reasonably accessible?
A coffee machine may need an outlet and a nearby place for supplies. Cooking oil may need to be accessible while cooking, but that does not automatically mean it belongs in the hottest or most crowded spot beside the range. A fruit bowl does not need to occupy the main prep run just because fruit is eaten daily.
3. Footprint cost
How much of your useful counter segment disappears when the item stays there?
Judge this against the counter you actually have, not against a photo of someone else’s kitchen.
4. Move/lift burden
If you store the item elsewhere, what does retrieving it require?
Consider repeated lifting, bending, carrying, and reaching as usability factors. This is not a medical or formal accessibility standard. It is simply an acknowledgment that “put it away” can be bad advice when the alternate storage location makes normal use awkward.
5. Operating constraints
Does the item need an outlet, water access, lid or door travel, ventilation, clearance, or protection from heat or splash?
If so, a location only works if those needs can be satisfied according to the exact product instructions where applicable.
6. Reset and cleaning burden
How much harder does the permanent item make it to clean and restore the work surface?
This is where a pretty containment tray can be deceptive. A tray may reduce visual spread, but it still occupies counter space and may still need to be moved so the counter underneath and around it can be cleaned.
Choose one of four outcomes
Permanent resident: The item genuinely benefits from staying out, has an acceptable footprint, works in the location, and does not make prep or cleanup unreasonably difficult.
Task-zone resident: The item should stay near the activity it supports but does not need to occupy the main prep surface. It may fit better toward the end of a run, in a corner, or on another nearby surface.
Mobile or contained resident: The item or group can be moved as one unit when the work surface is needed. This can work for a legitimate coffee setup, cooking caddy, or other grouped task when the containment actually reduces setup effort.
Relocate or store: The counter cost is greater than the convenience benefit. The item should move to a cabinet, drawer, shelf, wall, cart, nearby storage area, or another appropriate location.
Step 4: Decide Common Counter Categories One by One
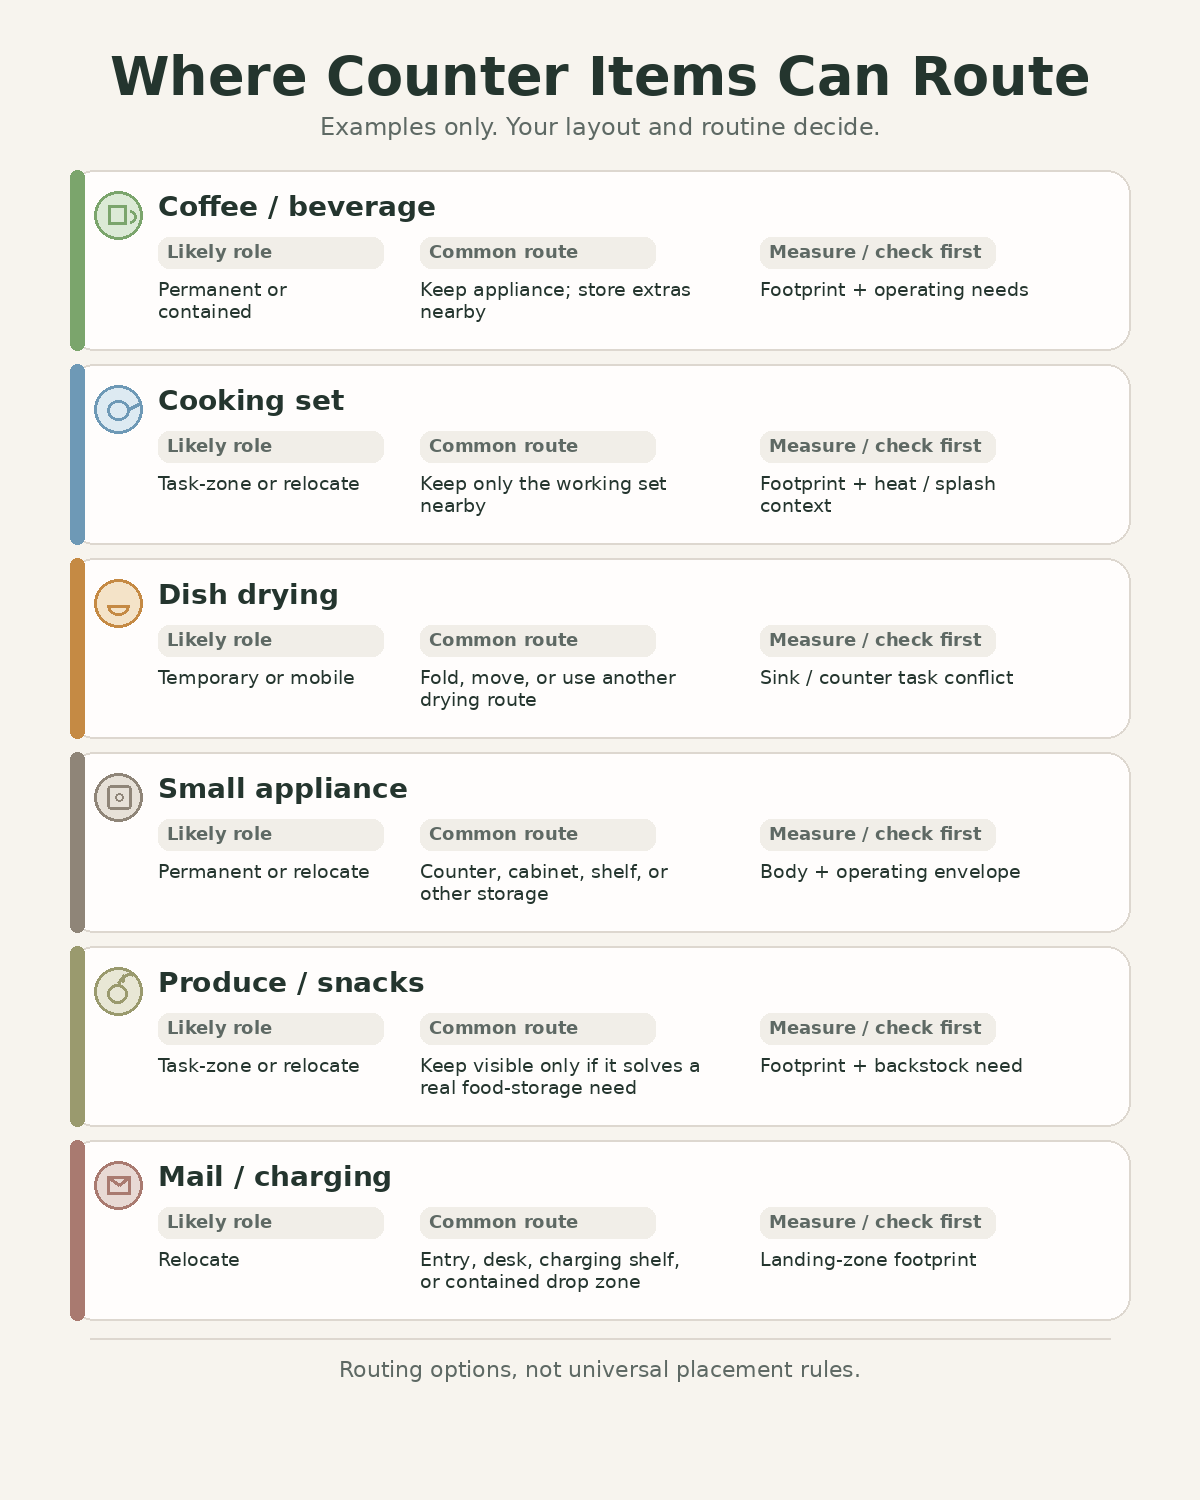
The framework becomes more useful when you apply it to real categories instead of treating every object the same.
Coffee and beverage setup
A coffee setup often earns counter space because it is used frequently and may need an outlet. But “coffee station” can quietly expand from one appliance into mugs, pods, syrups, sweeteners, filters, spoons, and decorative accessories.
Keep the part that actually needs the counter. Route the supporting supplies to the smallest nearby storage location that still makes the routine easy.
The coffee maker may be a permanent resident. The entire beverage inventory does not automatically deserve the same status.
Cooking oils, salt, spices, and utensils
These items benefit from task adjacency, which is why they naturally drift toward the range.
But keep the scope narrow. Ask which few items are genuinely used during most cooking sessions and whether they can live nearby without crowding prep or creating a heat/splash problem.
If your spice collection itself is the storage problem, that is a separate system. A06 only decides whether a small working set deserves counter residency; it does not turn the counter into a spice-storage article.
Dish drying and sink-edge items
Drying racks, soap, brushes, hand towels, and cleaning tools can consume the counter around the sink because they are tied to a high-frequency task.
Start by separating items that need to be wet-zone adjacent from items that have simply accumulated there.
A drying solution may justify some space if dishes are washed frequently and there is no better practical location. But if it consumes the best prep segment all day after dishes are dry, it may need to fold, drain elsewhere, move as a unit, or use a different route.
Kitchen
MECHEER Over-the-Sink Roll-Up Dish Drying Rack, 17.5 × 11.8 in
A useful option when a permanent dish rack takes up more counter space than a small kitchen can spare.
Check on Amazon (opens in a new tab)Appropriate cleaning supplies that do not need to remain on the counter may belong below the sink. For the plumbing-aware version of that decision, see the dedicated under-sink guide.
Small appliances
Small appliances are where the Counter Residency Test matters most.
A compact appliance can still be expensive if it blocks an upper cabinet or needs a large operating envelope. A bulky appliance can sometimes earn residency if it is used frequently and storing it elsewhere creates an unreasonable move/lift burden.
The decision should come from your routine, counter map, and the exact appliance requirements, not a generic “appliances should be hidden” rule.
Kitchen
OXO Good Grips Countertop Appliance Slider, 9 × 14 in
If an appliance already passes the Counter Residency Test but pulling it forward or repeatedly lifting it from storage creates friction, this slider can reduce that movement burden without adding another storage zone. OXO confirms a 9 × 14 × 1.2 in platform, an easy-press sliding mechanism, and a maximum supported load of 35 lb.
Check on Amazon (opens in a new tab)Produce and snacks
Produce bowls and snack baskets can become counter residents because the kitchen has no obvious pantry or because visibility helps people remember to use the food.
Ask whether the counter is solving a food-storage problem that belongs somewhere else.
If pantryless food and backstock are taking over the counters, use the dedicated no-pantry system instead of building a larger countertop food zone.
Mail, keys, phones, and charging clutter
A kitchen counter often becomes the household landing zone because it is flat, central, and visible. Very efficient. For creating clutter.
These items usually fail the task-adjacency test because they are not kitchen tools at all.
Give them a home based on where they are used: an entry station, wall pocket, desk, charging shelf, or small contained drop zone away from the primary prep segment.
The counter should not become permanent storage just because people walk past it.
Step 5: Route Items That Do Not Earn Permanent Counter Space
“Take it off the counter” is incomplete advice unless the item has somewhere realistic to go.
Routing is the second half of kitchen counter organization.
Move cabinet-friendly items into cabinets
If an item is compact enough, used often enough to stay nearby, but does not need to remain visible, cabinet storage may be the best tradeoff.
Do not rebuild your whole cabinet system here. Use the cabinet guide for zoning, vertical space, access, and fit.
Use drawers for tools that do not need vertical display
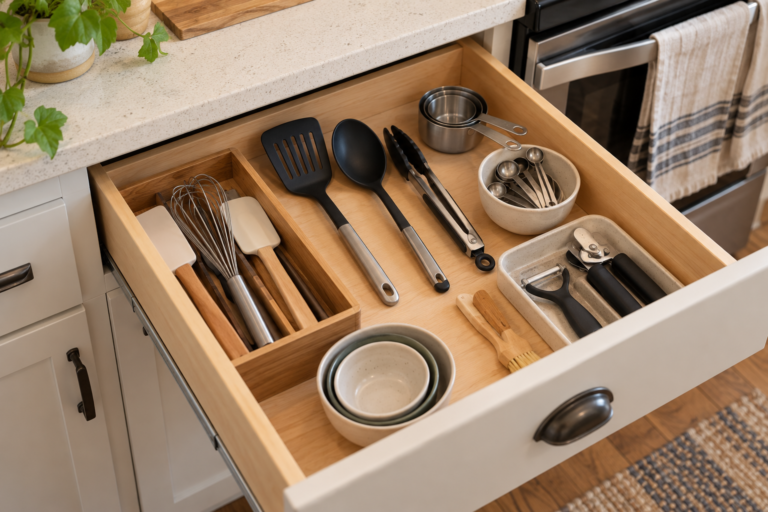
Kitchen tools that currently live in a counter crock may be good drawer candidates if they fit and remain easy to access.
The counter decision is simple: if the crock is consuming valuable prep surface, test whether the tools can move without making everyday cooking harder. Detailed drawer-fit methodology belongs in the dedicated kitchen-tool drawer guide, not here.
Route pantryless food away from the main prep segment
If cereal, bread, snacks, produce, drinks, or backstock are colonizing the counter because there is no pantry, treat that as a storage-routing problem rather than a counter-styling problem.
Use cabinets, drawers, freestanding storage, a nearby closet, or another appropriate route based on the no-pantry guide linked above.
Move appropriate cleaning supplies below the sink
Countertop cleaners, dishwasher supplies, extra sponges, and refill bottles may belong below the sink when the cabinet layout, plumbing access, labels, and household safety needs support that choice.
Keep the sink-base cabinet plumbing-first. Do not fill service areas simply to make the counter look empty.
Use wall, door, or removable storage selectively
Vertical storage can help when it moves frequently used items off the prep surface without making them harder to reach.
But do not treat “go vertical” as a magic command. A rail, hook, shelf, or removable system still needs adequate installation support, clearance, and a logical task location.
Renters should verify any mounting or removal claims for the exact system and their surfaces. For broader reversible small-apartment storage ideas, see the renter-focused guide.
Consider a mobile surface only when it solves the actual problem
A small cart or mobile work surface can add a place to park items or create temporary workspace, but it also occupies floor area and needs somewhere to live when not in use.
Treat it as a routing option, not an automatic upgrade. Detailed cart sizing and selection remains a future topic.
Step 6: Only Then Decide Whether You Need an Organizer
By this point, you should know three things:
- which counter segment you want to protect;
- which items genuinely deserve counter residency;
- which items need another destination.
Now an organizer can solve a defined problem instead of creating a prettier version of the same clutter.
When containment helps
Containment can be useful when several small items support one repeatable task and the group can stay compact.
A contained cooking set, coffee setup, or sink-edge group may be easier to move and reset than several loose objects.
But containment is only helpful if the group has already earned the space.
When a riser or rack simply consumes more surface
Vertical organizers can make a counter look efficient while quietly expanding the amount of permanent storage living on the work surface.
Measure the organizer’s own footprint. Check whether it blocks cabinets, outlets, sight lines, or easy cleaning. Then ask whether the items could be stored off-counter instead.
The goal is not to create the tallest possible stack. The goal is to preserve useful work surface.
When mobile or off-counter storage is better
If an item is useful but does not need permanent display, a mobile caddy, drawer, cabinet, wall system, or nearby storage location may provide better access per inch of counter sacrificed.
This is also where future affiliate recommendations must stay disciplined: problem first, then measurement and fit, then decision, and only then a product if one genuinely helps.
Step 7: Test the Setup During a Normal Meal and Cleanup
Do not judge the new counter setup immediately after arranging it.
Use it.
Make a normal meal, prepare coffee, unload groceries, wash dishes, and clean the surface. The layout should make those tasks easier without requiring constant shuffling.
Can you prep without moving multiple items first?
If you need to relocate the toaster, fruit bowl, utensil crock, and coffee supplies every time you chop vegetables, the prep zone is not actually reserved.
A good setup should let you begin the main task with minimal clearing.
Can frequently used tools be reached without awkward lifting?
If the counter is beautifully empty but the appliance you use constantly is now in a low, difficult cabinet, the system may have traded visual neatness for daily friction.
Reconsider whether that item should be a permanent resident, task-zone resident, or easier-to-move contained resident.
Can the surface be cleaned without dismantling the system?
Cleanability is part of the residency decision because counters are food-preparation surfaces, not museum displays.
USDA guidance says countertops and other surfaces that come into contact with raw meat, poultry, fish, or eggs should be washed with hot, soapy water before moving on to the next food-preparation step. USDA also advises cleaning kitchen surfaces before sanitizing or disinfecting when those steps are appropriate, and following manufacturer directions for commercial products. Sources: https://www.fsis.usda.gov/food-safety/safe-food-handling-and-preparation/food-safety-basics/cleanliness-helps-prevent and https://www.fsis.usda.gov/food-safety/safe-food-handling-and-preparation/food-safety-basics/washing-food-does-it-promote-food
Your organization system should make it reasonably easy to expose and clean the work surface.
Revise residency decisions based on actual use
If the counter still feels cramped, do not immediately buy smaller containers.
Watch what happened during the test:
- Which item did you move first?
- Which item never got used?
- Which location created a lid, door, or cabinet conflict?
- Which item was annoying to retrieve after you stored it?
- Which group spread back across the prep zone?
Adjust the residency decision, not just the styling.
Common Kitchen Counter Organization Mistakes
Creating zones before reserving prep space
Zones are useful only after the main work surface has been protected. Otherwise, every inch becomes a “zone” and the kitchen ends up with no place left to work.
Buying organizers before measuring
An organizer cannot fix a counter if its own footprint, height, or operating conflicts make the space worse. Measure the segment and the items first.
Using an arbitrary daily-item rule
“Keep out what you use every day” is too blunt. Daily use is one factor, not the whole decision.
Ignoring lid, door, cord, and upper-cabinet conflicts
A permanent location needs to work while the item is actually being used, not just while it is sitting still.
Moving heavy or awkward appliances to inconvenient storage
Clearing the counter should not create a routine of lifting, bending, or carrying that makes the kitchen harder to use.
Treating aesthetic emptiness as the goal
A completely empty counter is not automatically better than a functional one. A small kitchen may reasonably keep selected high-value residents visible.
The goal is usable prep space, not proof that nobody lives there.
Letting a temporary landing zone become permanent storage
Grocery bags, mail, lunch containers, and clean dishes often arrive “just for now.” If the same items repeatedly land on the prep segment, create a destination for that transition instead of repeatedly clearing the same pile.
Frequently Asked Questions
What should stay on kitchen counters?
Keep items that genuinely benefit from immediate access and whose footprint, operating needs, and cleanup burden fit the counter you actually have. An item does not earn permanent space based on frequency alone. Run it through the Counter Residency Test: frequency, task adjacency, footprint cost, move/lift burden, operating constraints, and reset burden.
How do I organize kitchen counters in a small kitchen?
Start by mapping your continuous counter segments and reserving the best one for prep. Then measure permanent items in their real operating position, not just by body size. Decide what stays, what moves to a task zone, what can travel as a contained unit, and what should be stored elsewhere. Add organizers only after those decisions are clear.
How can I maximize kitchen counter space without remodeling?
The fastest gains usually come from reclaiming surface that is being used as passive storage. Protect one useful prep segment, move items that fail the residency test, and use cabinets, drawers, walls, or mobile storage where those routes genuinely improve access. Physical extensions or carts can help in some kitchens, but they also consume space elsewhere and should be measured as carefully as the counter itself.
How much prep space should I try to keep clear?
There is no single universal amount that works for every existing kitchen. As a professional planning reference, NKBA recommends a continuous 36-inch-wide by 24-inch-deep countertop immediately next to a sink for a primary preparation/work area, while noting that state or local codes may apply. In an existing small kitchen with less space, protect the most functional continuous segment you have rather than forcing a number that the layout cannot provide.
Where should small appliances go in a small kitchen?
Use the Counter Residency Test. Appliances that are frequent, difficult to move, and well matched to a safe operating location may deserve permanent space. Appliances with a high footprint cost and low use frequency may work better in a cabinet, shelf, cart, or other storage location. Always follow the exact manufacturer’s placement and operating instructions for the appliance involved.
How do I organize a kitchen counter corner?
Treat the corner as its own segment. Check reach, upper-cabinet access, nearby appliance doors, and whether the corner is actually useful for prep. Corners often work better for task-zone residents or compact contained groups than for the main prep area, but the layout should decide that rather than a generic corner-organizer rule.
Should I keep oils or spices beside the stove?
Keep only the small working set that genuinely benefits from cooking adjacency and that can be stored in a location appropriate for the exact product and kitchen conditions. Avoid turning the range area into bulk spice or oil storage. If the whole spice collection needs organization, use a dedicated spice-storage system rather than expanding the countertop zone.
The Bottom Line
Good kitchen counter organization is not about making every surface empty or arranging clutter into prettier containers.
It is about deciding what the counter is for.
Reserve the best work surface first. Measure what permanent items truly cost when they are used, not just when they are parked. Make each resident justify its location, footprint, movement burden, operating needs, and cleanup cost. Then route everything else somewhere that still works in real life.
That sequence gives you something most counter-organization advice does not: a repeatable way to decide what stays before you spend money trying to store it.