15 Small Apartment Kitchen Storage Ideas for Renters
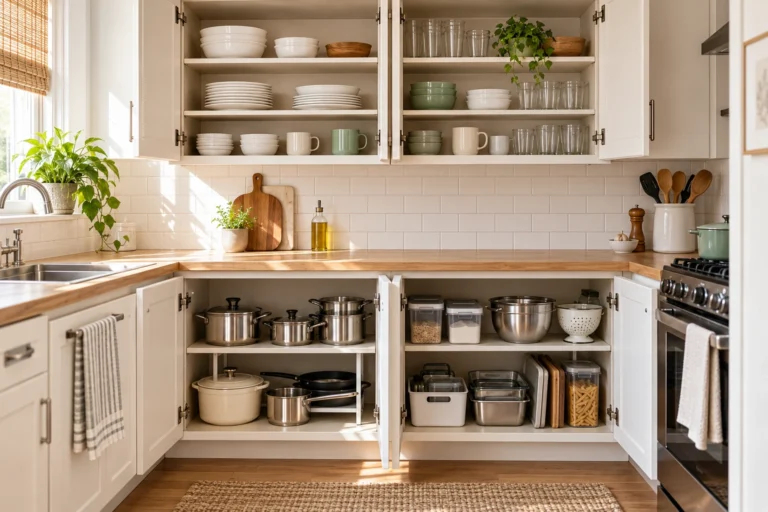
A rental kitchen can have empty space you cannot easily use: a tall cabinet with fixed shelves, an exposed refrigerator side, or a narrow gap that looks promising until you open the dishwasher.
The challenge is adding storage without changing someone else’s kitchen—or buying something that creates a different problem.
These small apartment kitchen storage ideas focus on removable organizers, compatible surfaces, and furniture that fits your daily routine. Start with one problem and the least permanent solution that addresses it.
For broader help with clutter, cabinet zoning, and everyday placement, see our guide to small kitchen organization ideas. Here, the priority is working within rental restrictions.
Useful first. Beautiful second. An organizer earns its place when it makes something easier to store, reach, or put away.
Affiliate disclosure: This guide contains affiliate links. As an Amazon Associate I earn from qualifying purchases. We recommend products based on problem-solution fit, dimensions, compatibility, and practical usefulness. Read the disclosure.
In This Guide
What Counts as Renter-Friendly?
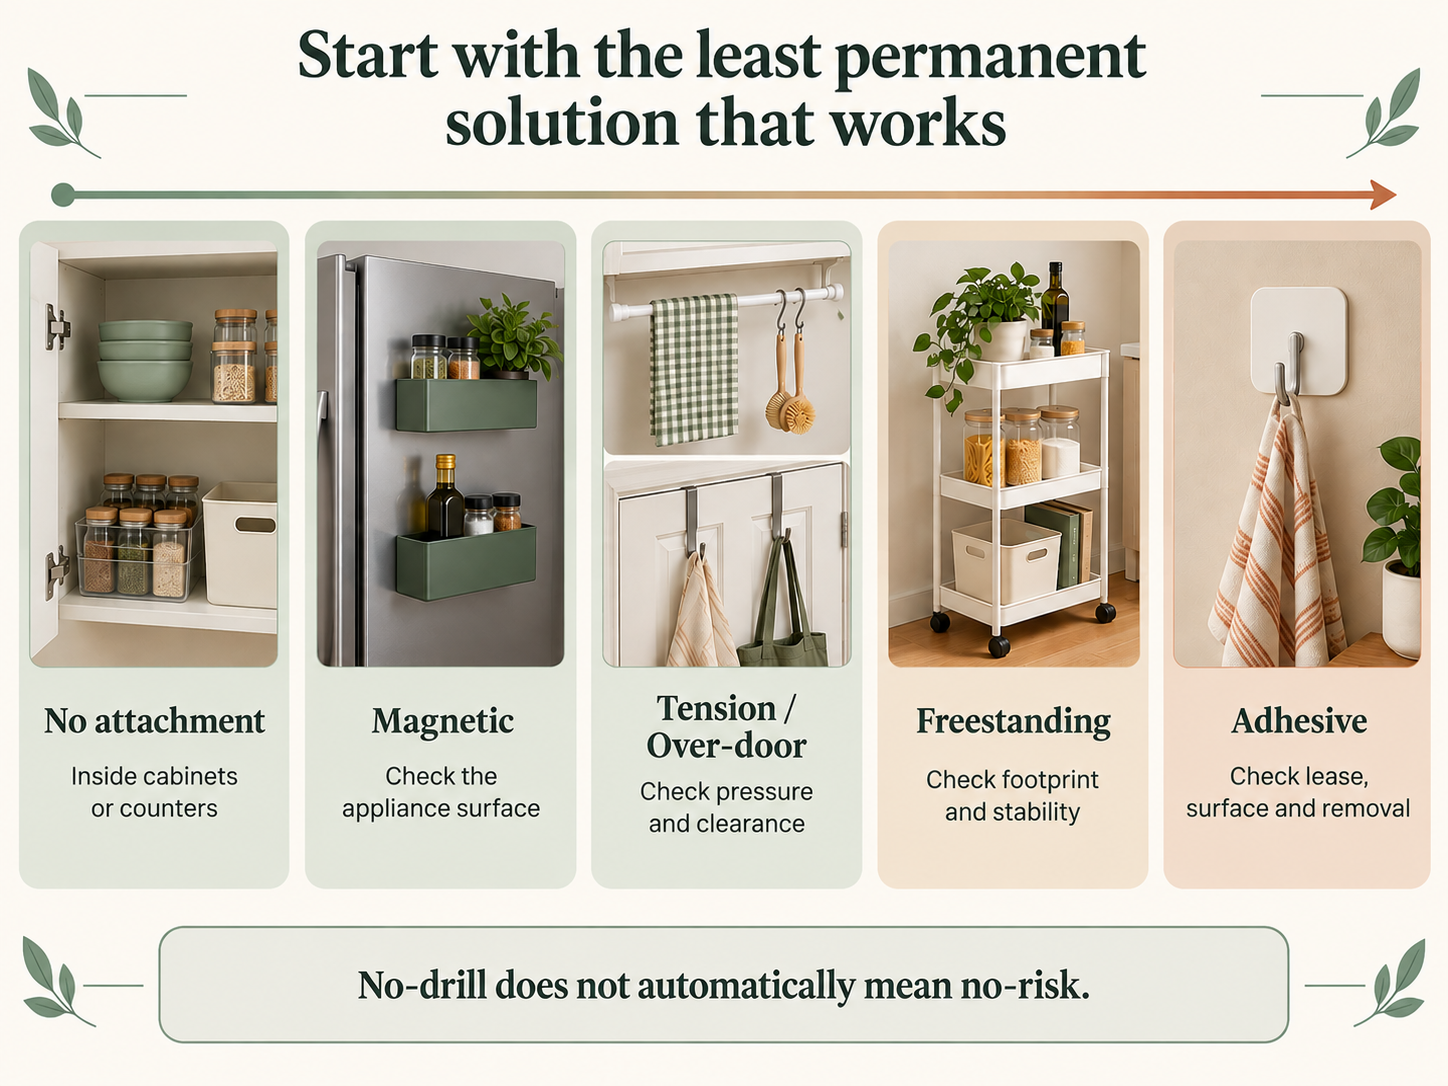
Start with organizers that rest inside existing cabinets. Consider magnetic, tension-mounted, or over-door options only after checking the supporting surface. Add furniture when the capacity justifies its footprint and you can meet its installation requirements.
No-drill does not automatically mean no-risk. Magnets can scratch finishes, tension rods can mark cabinet sides, hooks can rub doors, and removable adhesive can lift paint. Freestanding furniture may still require wall anchoring.
Check your lease and request written permission when an attachment or alteration is unclear. Permission does not replace safe installation.
The Space Gain descriptions below distinguish added storage from recovered work surface. Accessibility Gain identifies improvements that mainly make existing storage easier to reach. Renter-safe describes conditions to check, not a promise of damage-free use.
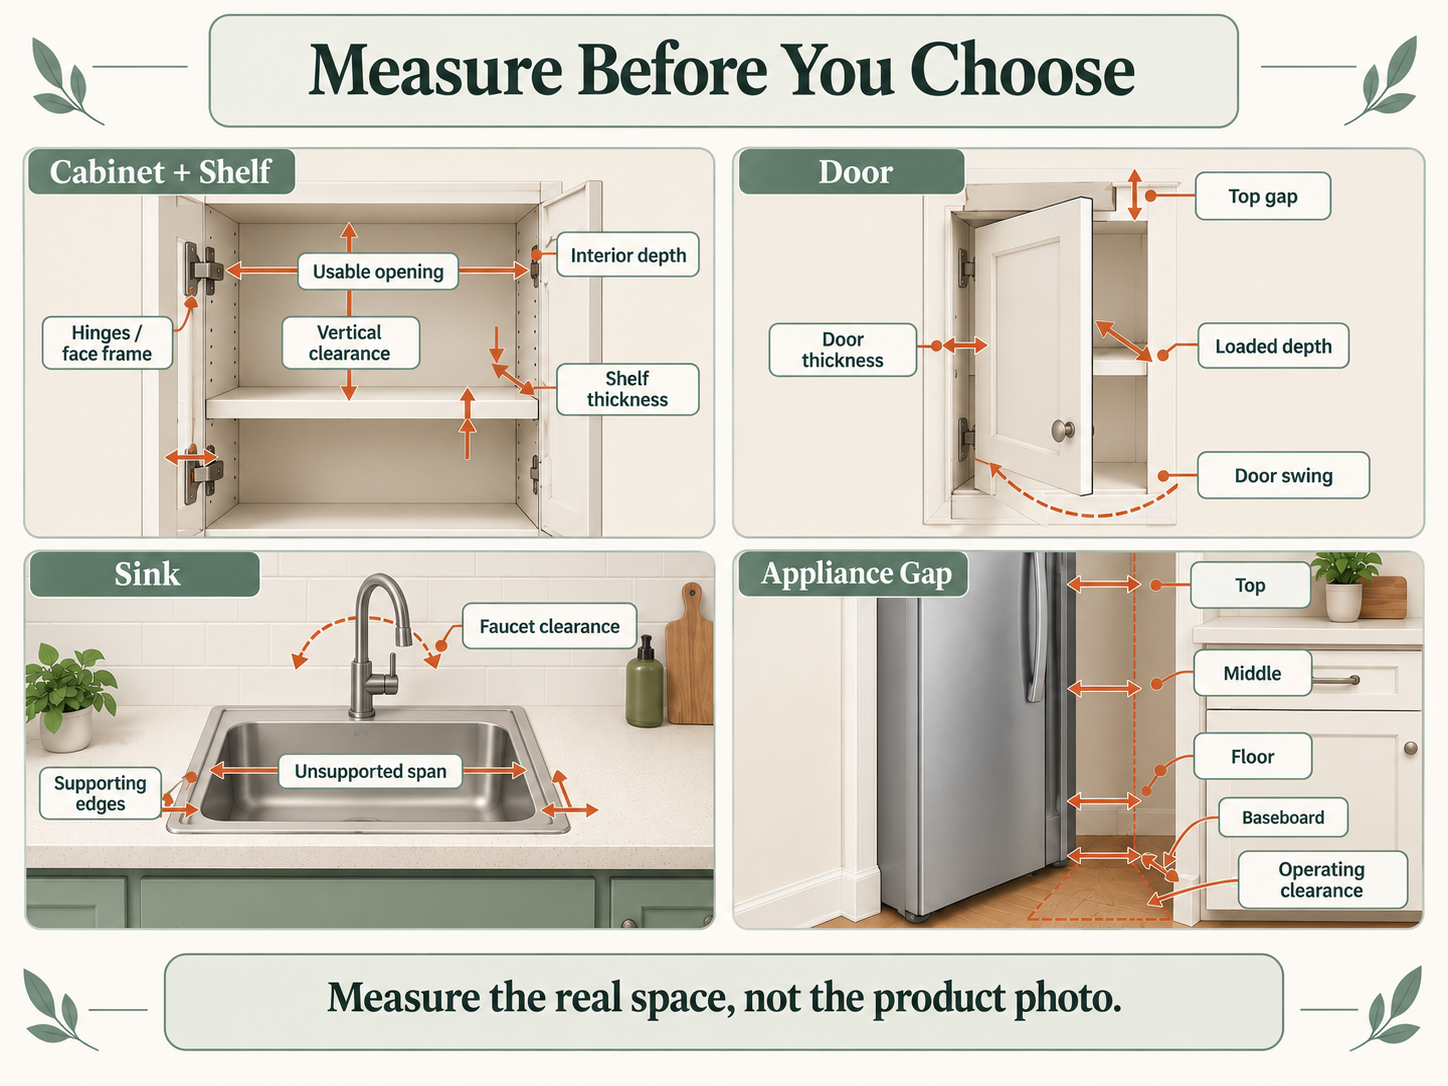
Measure Before You Choose
Record measurements in inches, including fractions. Compare the organizer’s full external dimensions—not just its advertised storage capacity.
- Cabinets: Measure interior width, depth, and height, then the narrower usable opening. Account for face frames, hinges, center stiles, and the room needed to insert and remove the organizer.
- Shelves: Check thickness, front lips, support condition, and clearance above and below. Clip-on arms occupy space on the upper surface too.
- Doors: Check thickness, the gap above the door, hinge movement, and the loaded organizer’s depth when closed.
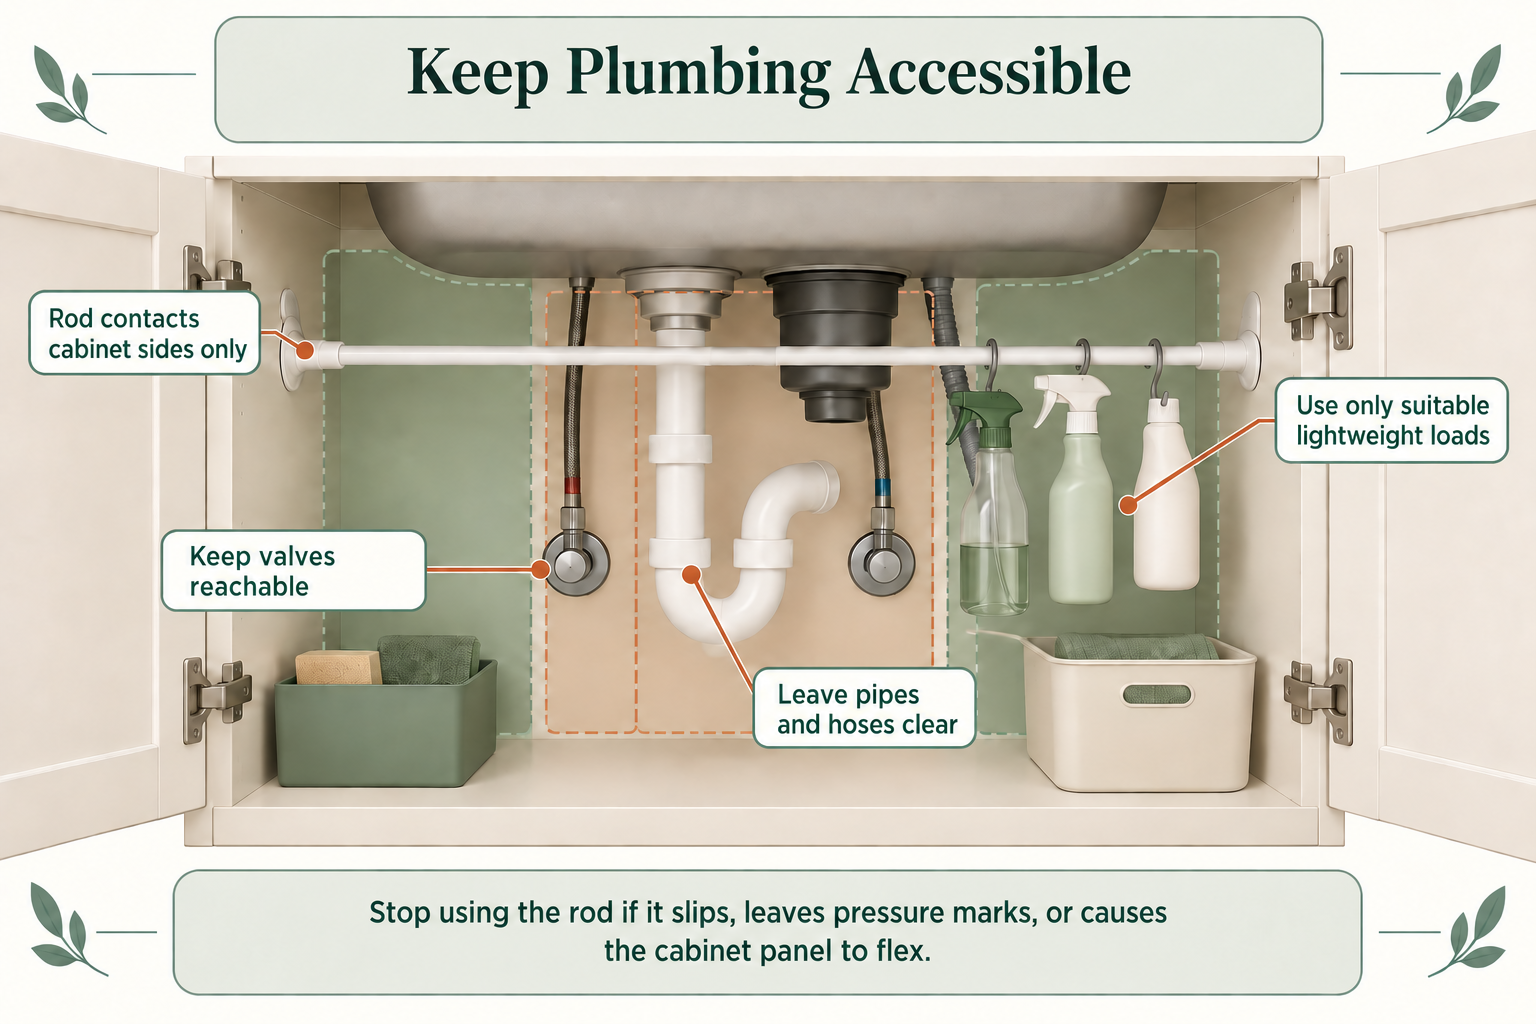
- Under the sink: Map the P-trap, disposal, supply lines, hoses, valves, and any electrical connections. Leave access for leaks and maintenance.
- Appliances and gaps: Measure at floor, middle, and top. Include baseboards, handles, wheels, and the withdrawal path. Use the appliance’s own installation instructions for ventilation and operating clearances.
- Sink: Measure the unsupported opening in the direction a rack will span, its supporting edges, faucet movement, and remaining basin access.
- Floor space: Check furniture with doors, drawers, and appliances open. Include the standing room needed to use them, not merely enough space for a door to swing.
Start Inside Existing Cabinets and Work Areas
1. Add Shelf Risers Where Fixed Shelves Waste Height
When you cannot reposition a rental’s shelves, a freestanding riser can divide one tall compartment into two usable levels. Choose what will sit above and below it before choosing the riser.
Keep its feet fully supported and check both the riser’s load limit and the existing shelf’s condition. Leave room to lift a mug or plate without scraping the shelf above.
Space Gain: Moderate when overhead space is unused.
Effort: Low.
Renter-safe: No attachment; check feet and finish compatibility.
Measure First: Opening, shelf depth, and loaded clearance on both levels.
Best For: Short dishes or containers beneath fixed shelves.
Skip If: Retrieving items requires unloading the upper level.
2. Slide a Basket Under an Existing Shelf
A slide-on basket can hold towels, wraps, or small packets beneath a shelf without installing brackets. It serves a shallow gap that may be too small for another shelf level.
Check whether the basket’s arms fit the shelf thickness and front edge. Those arms must not destabilize dishes stored above. Do not force a tight clip over a delicate finish.
Space Gain: Modest additional storage.
Effort: Very low.
Renter-safe: Conditional on shelf strength and contact points.
Measure First: Shelf thickness, basket depth, arm length, and clearance below.
Best For: Lightweight supplies in otherwise unused space.
Skip If: It rubs the door or blocks the main shelf contents.
Kitchen
Tebery 2 Pack White Under Shelf Wire Basket Hanging Storage Baskets
A simple way to add shallow storage beneath an existing cabinet shelf without drilling, adhesive, or permanent hardware.
Check on Amazon (opens in a new tab)(paid link)
3. Separate Flat Items With Freestanding Dividers
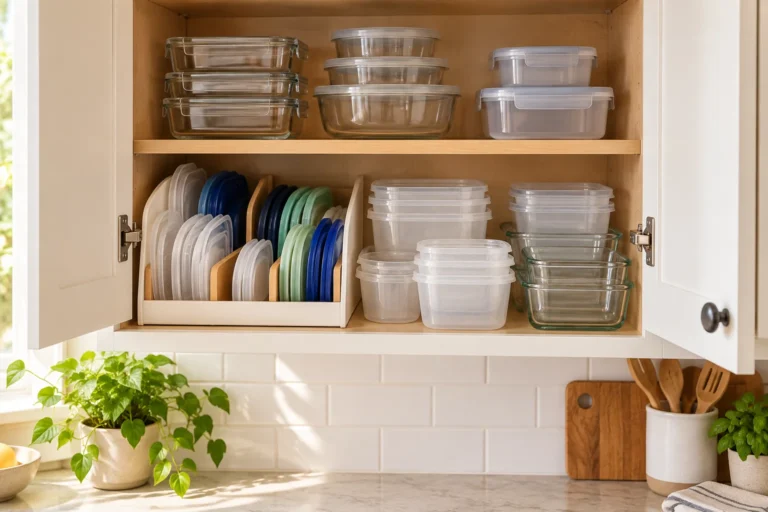
Use a freestanding rack to hold boards, trays, and baking sheets upright instead of attaching dividers to the cabinet. Choose slots wide enough for your thickest board and tall enough to support the pieces.
A tension-style alternative needs sound opposing surfaces and a compatible adjustment range. It should not bow cabinet panels or rely on excessive pressure.
Space Gain: Variable. Accessibility Gain: Retrieve one piece independently.
Effort: Low.
Renter-safe: Prefer freestanding; tension mounting needs surface checks.
Measure First: Item height, slot width, cabinet opening, and extraction space.
Best For: Flat items buried in stacks.
Skip If: Heavy boards tip the rack or cannot clear the opening.
4. Use Handled Bins Instead of Installed Pull-Outs
A handled bin can bring a group of supplies forward without screws, rails, or cabinet modifications. Try a container you already own before buying one.
Choose a manageable loaded weight. A bin is not a drawer: unless it has a designed stop, pulling it beyond the shelf edge can let it fall. Support it while removing it, and check the base for rough edges that could scratch shelving.
Space Gain: Little or none. Accessibility Gain: Better access to deep shelves.
Effort: Very low.
Renter-safe: No attachment; protect the shelf surface.
Measure First: Narrowest opening, handle projection, depth, and lift-out room.
Best For: Packets or lightweight pantry categories.
Skip If: The loaded bin is awkward to lift.
5. Replace a Permanent Dish Rack With a Roll-Up Sink Rack
A roll-up rack can move drying space over part of the sink, freeing the adjacent counter. Roll it away when you need the full basin.
Measure the span between supporting edges and confirm sufficient support at both ends according to the rack’s instructions. Check faucet travel and space for washing larger items. Do not assume a drying rack is also suitable for hot pans or chopping.
Space Gain: Recovered counter area, not cabinet storage.
Effort: Very low.
Renter-safe: No attachment; check stability and contact surfaces.
Measure First: Sink span, supporting ledges, rack width, and faucet clearance.
Best For: Counters dominated by drying dishes.
Skip If: The rack rocks, slips, or blocks essential sink access.
Kitchen
MECHEER Over-the-Sink Roll-Up Dish Drying Rack, 17.5 × 11.8 in
A useful option when a permanent dish rack takes up more counter space than a small kitchen can spare.
Check on Amazon (opens in a new tab)(paid link)
6. Add a Countertop Riser Only Where It Helps
A compact riser can organize tea supplies or mugs when you cannot install a wall shelf. Its value depends on usable space both above and below it.
Outline its footprint with loose paper before buying. Include handles and the clearance needed to retrieve items. Keep it away from cooking heat, and do not place operating appliances beneath it unless their instructions permit that arrangement.
Space Gain: Modest, within the same counter footprint.
Effort: Very low.
Renter-safe: No attachment; check feet and counter finish.
Measure First: Base dimensions, upper-cabinet clearance, and retrieval space.
Best For: A small, established daily-use zone.
Skip If: It consumes your main preparation surface.
Use Existing Surfaces Carefully
7. Try Magnetic Storage on a Compatible Refrigerator Side
A shallow magnetic rack can hold lightweight supplies without adhesive. First confirm that the panel attracts a magnet and that the appliance’s care guidance permits the intended accessory.
Magnetic attraction alone does not establish a safe load. Follow the rack’s instructions, keep contact surfaces clean, and avoid dragging it across the finish. Leave vents, seals, hinges, and required appliance clearances unobstructed.
Space Gain: Modest additional storage.
Effort: Very low.
Renter-safe: Conditional on appliance surface and mounting compatibility.
Measure First: Usable panel, loaded rack projection, and door travel.
Best For: Lightweight items on an accessible side panel.
Skip If: The panel is unsuitable or nearby heat makes it a poor storage location.
Kitchen
Sevenblue 4-Pack Magnetic Spice Rack for Refrigerator with Hooks
A clean way to use an exposed refrigerator side for accessible storage without drilling or adhesive mounting.
Check on Amazon (opens in a new tab)(paid link)
8. Use an Under-Sink Tension Rod Only for Suitable Loads
A compatible tension rod can suspend a few lightweight items between sturdy cabinet sides. Check that its rated use covers the intended setup; a bottle’s trigger is not automatically a reliable hanging point.
Position it clear of pipes, hoses, disposal equipment, and valves. Do not brace it against plumbing or tighten it until cabinet panels flex. Stop using it if it slips or leaves pressure marks.
Space Gain: Modest, conditional hanging space.
Effort: Low.
Renter-safe: Conditional; tension can damage finishes.
Measure First: Rod span, contact surfaces, plumbing, and hanging depth.
Best For: Light supplies compatible with hanging storage.
Skip If: Panels are weak, damp, uneven, or delicate.
9. Hang a Slim Organizer Over a Cabinet Door
An over-cabinet organizer can hold wraps or a few thin boards without screw-mounted hardware. Check that the model actually supports hook-only installation.
Fit it empty first. Close the door slowly, checking the top gap, hinges, shelves, and neighboring drawer. Repeat with a light load. Protective pads may reduce rubbing, but they also change the fit and do not guarantee an unmarked finish.
Space Gain: A narrow additional storage layer.
Effort: Low.
Renter-safe: Conditional on door strength and clearance.
Measure First: Door thickness, hook clearance, and loaded depth.
Best For: Thin, lightweight supplies.
Skip If: The door binds, sags, or no longer closes normally.
10. Use a Full-Door Organizer With Truly Removable Mounting
A pantry or utility door offers more storage area than a cabinet door, but the mounting demands may differ. Some “over-door” systems also require screws or adhesive stabilizers. Read the complete installation instructions before treating one as removable.
Check the door’s construction and condition. Keep loads within the organizer’s limits and avoid a setup that swings into the frame or wall.
Space Gain: Potentially substantial.
Effort: Low to medium.
Renter-safe: Conditional on the complete mounting method.
Measure First: Door thickness, top gap, basket depth, swing, and bottom clearance.
Best For: Lightweight packaged supplies near the kitchen.
Skip If: Required fasteners are prohibited or the door cannot close and latch properly.
Kitchen
DELAMU 6-Tier Over-the-Door Pantry Organizer
One of the stronger options for renters who need meaningful pantry capacity but do not want to add a freestanding cabinet.
Check on Amazon (opens in a new tab)(paid link)
Add Capacity Only Where Furniture Fits
11. Put a Slim Rolling Cart in a Verified Gap
A narrow cart can use space beside cabinetry without changing the cabinets. A gap beside an appliance needs an additional check: it may be required clearance rather than spare storage.
Measure the cart’s widest points, including handles and wheels, and its entire route out of the gap. Keep heavier contents low and move it slowly; a narrow footprint deserves careful loading.
Space Gain: Added capacity within an existing gap.
Effort: Low to medium.
Renter-safe: No fixed attachment only if the design permits it.
Measure First: Gap at several heights, projections, floor transitions, and withdrawal path.
Best For: Accessible gaps outside appliance clearance zones.
Skip If: The cart catches, leans, or obstructs airflow or doors.
Kitchen
SPACEKEEPER Slim Rolling Storage Cart
A slim cart can convert a dead gap beside a refrigerator or cabinet into usable storage without permanent installation. The important part is buying for the actual gap rather than choosing a cart first and hoping it fits later.
Check on Amazon (opens in a new tab)(paid link)
12. Choose a Rolling Island That Works While Stationary
A rolling island can add storage and preparation space when built-in counters are limited. It needs a usable parking position; moving it whenever someone opens the refrigerator quickly becomes inconvenient.
Choose a unit intended for preparation tasks and follow its stability and loading instructions. Lock the casters before working. Use an appropriate cutting board rather than assuming the top is a cutting surface.
Space Gain: Added storage and work surface.
Effort: Medium.
Renter-safe: Conditional on safe assembly, placement, and any securing requirements.
Measure First: Full footprint, handles, open drawers, appliance swing, and standing space.
Best For: Kitchens with genuinely spare floor area.
Skip If: It narrows the main route or shifts during normal preparation.
13. Create a Freestanding Pantry Without Skipping Anchoring
A pantry cabinet or shelving unit can add food storage, but “freestanding” does not mean “safe without wall attachment.”
Read the assembly and anti-tip instructions before buying. CPSC recommends anchoring furniture to prevent tip-overs. If the unit needs securing, obtain permission and use appropriate anchoring; do not leave it unsecured because you rent. Choose a different storage approach when safe installation is unavailable.
Space Gain: Substantial added capacity.
Effort: Medium.
Renter-safe: Conditional; anchoring may require permission.
Measure First: Footprint, assembly space, door travel, and anchoring location.
Best For: Apartments without enough food-storage cabinetry.
Skip If: You cannot meet installation or anti-tip requirements.
14. Move Occasional-Use Items to Nearby Storage
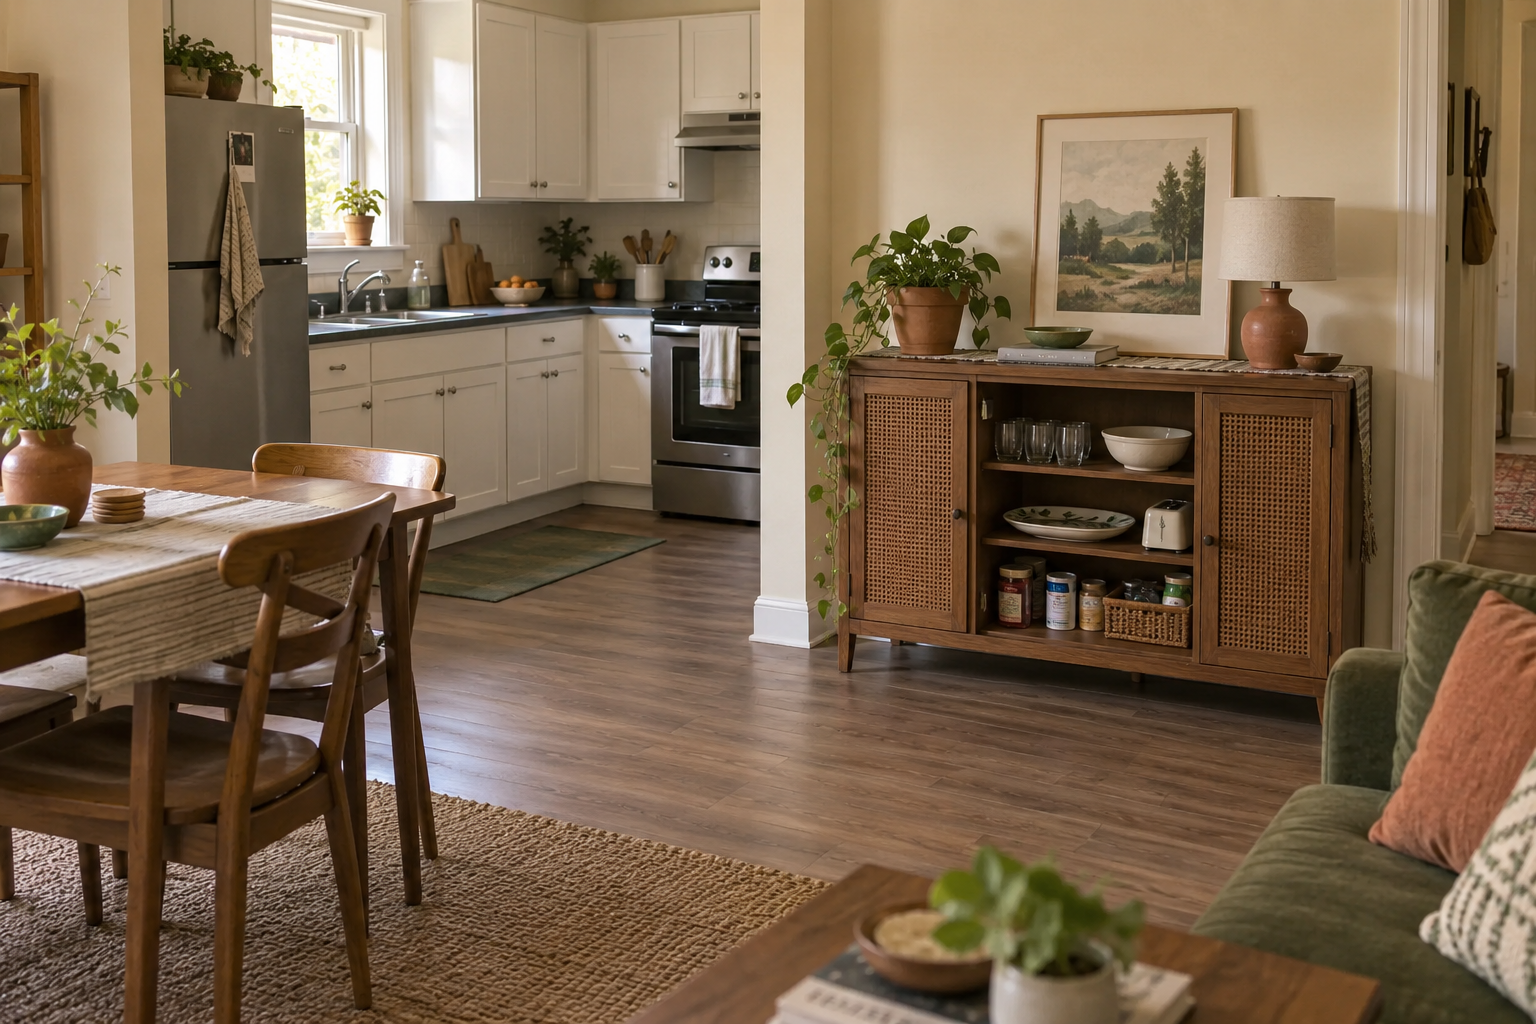
An existing dining-room cabinet can hold serving pieces, extra dishes, or appliances used occasionally, freeing kitchen cabinets for everyday items. Try existing storage before adding another piece of furniture.
Store appliances switched off and unplugged. A storage cabinet is not automatically a suitable place to operate them. If buying a sideboard, check its loading and anti-tip requirements just as carefully as a pantry unit’s.
Space Gain: Recovered kitchen capacity.
Effort: Low with existing furniture; medium if adding it.
Renter-safe: Depends on furniture installation and floor contact.
Measure First: Shelves, cabinet opening, lifting height, and walking route.
Best For: Infrequently used pieces.
Skip If: Retrieval becomes unsafe or furniture crowds circulation.
Treat Adhesive Storage as Conditional
15. Use Removable Hooks for Light, Low-Consequence Items
A removable hook may suit a towel or light tool when other storage methods do not fit. Check the exact product’s approved surfaces, load, preparation, waiting time, environmental limits, and removal instructions.
Keep the removal tab accessible. Avoid loose paint, uncertain finishes, and locations exposed to heat or steam unless explicitly supported. Follow the specified removal method rather than pulling the hook outward. Manufacturer instructions vary; surface compatibility matters.
Space Gain: Small.
Effort: Low, plus any required waiting time.
Renter-safe: Conditional; removal is not a damage guarantee.
Measure First: Surface, item clearance, and removal-tab access.
Best For: Lightweight items away from hazards.
Skip If: The lease prohibits adhesives or falling contents could injure someone.
Which Storage Fix Should You Try First?
Choose the smallest intervention that addresses your main problem. Check the limiting condition before shopping.
| Your main problem | Start with | Check before committing |
|---|---|---|
| Fixed shelves waste height | Shelf riser, #1 | Loaded clearance above and below |
| A shallow gap sits below a shelf | Slide-on basket, #2 | Shelf thickness and upper-arm interference |
| Boards disappear in stacks | Freestanding divider, #3 | Upright removal space |
| Deep shelves are hard to reach | Handled bin, #4 | Manageable loaded weight |
| Drying dishes occupy the counter | Sink rack, #5 | Secure support and basin access |
| You need removable vertical storage | Magnetic rack, #7 | Appliance compatibility and clearance |
| Thin supplies fill cabinets | Cabinet-door organizer, #9 | Normal door closure |
| You have a suitable pantry door | Full-door organizer, #10 | Whether additional fasteners are required |
| A narrow gap appears unused | Slim cart, #11 | Ventilation and withdrawal path |
| Storage and prep space are both short | Rolling island, #12 | A workable permanent parking spot |
| Food storage is insufficient | Pantry unit, #13 | Anchoring permission and safe installation |
| Occasional-use items fill prime cabinets | Nearby existing storage, #14 | Safe lifting and retrieval |
Frequently Asked Questions
What if my landlord does not allow furniture anchoring?
Do not omit required anti-tip hardware. Ask whether an approved installation is possible. If it is not, use existing cabinetry or another storage approach that can be installed safely within the restrictions.
Is a hidden test enough to prove an adhesive will remove cleanly?
No. A small test cannot guarantee how a larger attachment will behave after prolonged loading or on a different patch of finish. Follow the product instructions and treat uncertain surfaces as a reason to choose another method.
Can I take these organizers to my next apartment?
Usually, but portability does not guarantee a second fit. Keep dimensions and instructions, and recheck new shelves, doors, surfaces, and appliance clearances. Replace single-use mounting components when the manufacturer requires it.
How can I tell whether an organizer is helping?
Use it through normal cooking and cleanup. Notice whether retrieval is easier, doors still move normally, and the organizer stays stable without marking surfaces. If it adds extra steps or creates a new obstruction, reduce the load, relocate it, or remove it.