Small Closet Organization Ideas That Fit Your Reach-In Closet
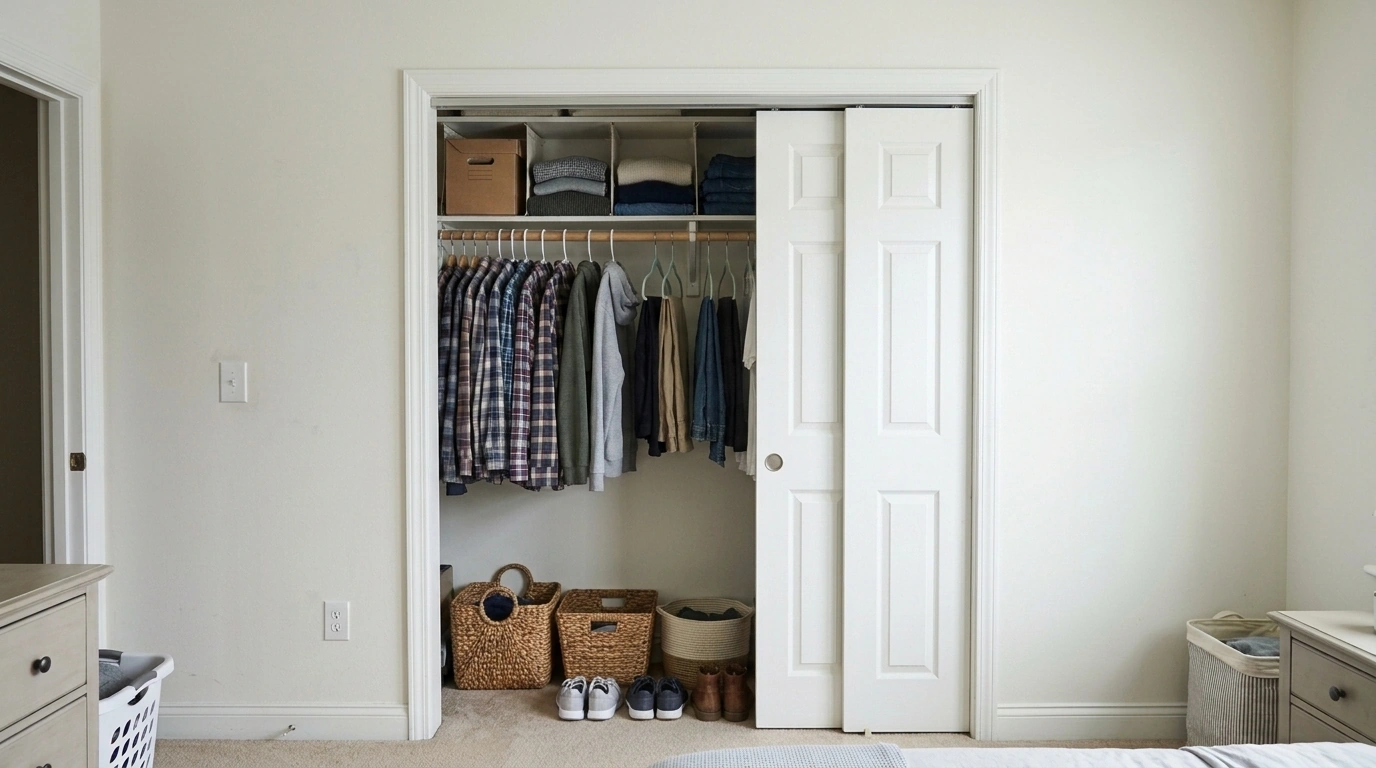
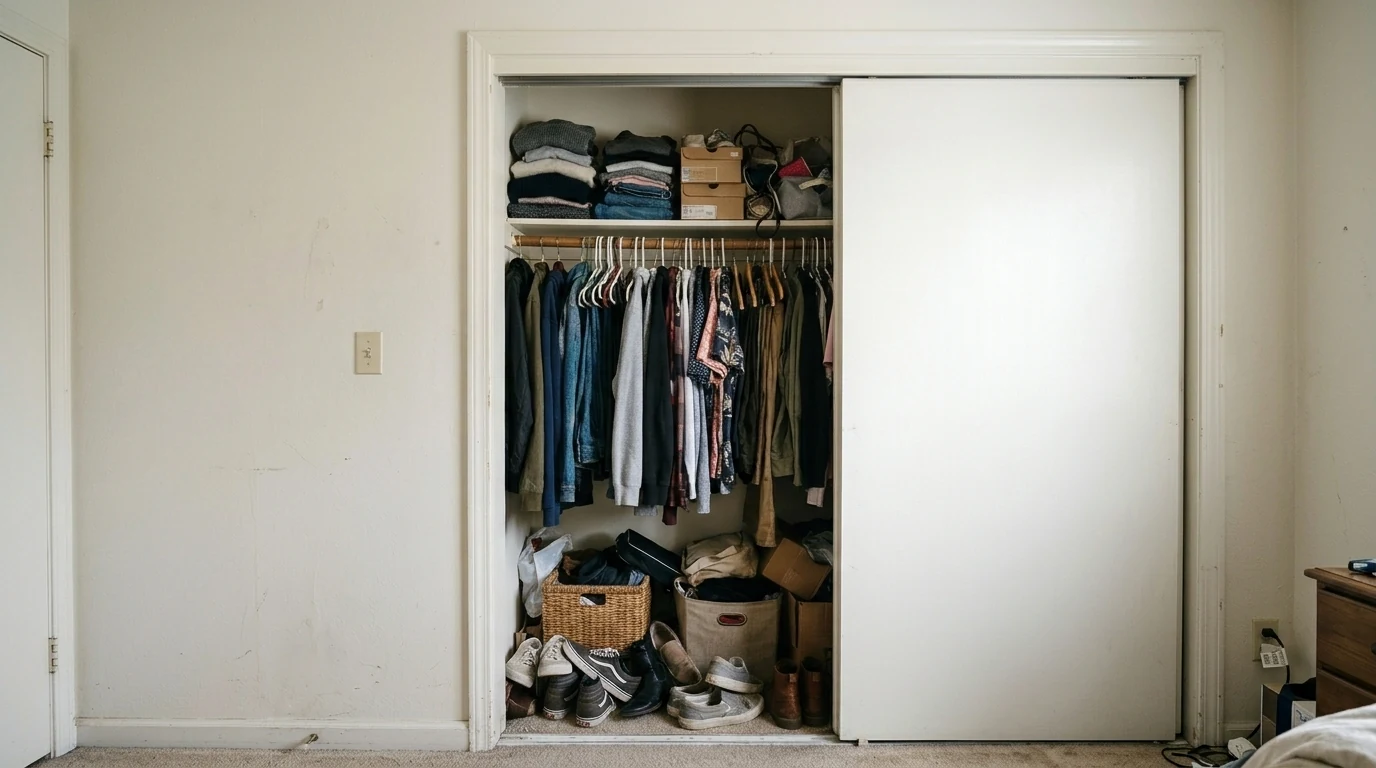
A small reach-in closet doesn’t always need more organizers. Sometimes clothes are crowded together, shelves hide what you own, or closet doors make part of the space difficult to reach.
Adding another rod, basket, or shelf organizer might help. But the wrong product can make an already cramped closet harder to use.
The goal isn’t to fit the most stuff. It’s to make your belongings easier to find, reach, and put away.
Quick Answer: How to Organize a Small Closet
Start by identifying your main problem: crowded hanging clothes, messy shelves, blocked access, or a difficult storage routine. Measure the usable space, including door clearance, and try rearranging what you already own. Only consider an organizer if it fits the closet, has suitable support, and makes everyday access easier.
This guide focuses on existing small reach-in closets with hinged, bifold, or sliding doors.
Quick Navigation: Find Your Closet Problem
- Too many clothes on hangers
Section 5A — Second Hanging Level - Folded clothes need better storage
Section 5B — Hanging Fabric Shelves - Sweaters or accessories mix together
Section 5C — Shelf Dividers - Not sure what will fit
Section 3 — Measure Your Closet - Want to organize without buying
Section 4 — No-Buy Changes - Worried about installation or damage
Section 6 — Safety and Renter Checks - Want to know whether your system works
Section 7 — Everyday-Use Check
1. Find What’s Making Your Closet Difficult to Use
Open your closet and try doing three normal tasks: finding an item, taking it out, and putting it back.
Notice what gets in the way.
| What happens | Likely issue to investigate |
|---|---|
| Hangers are tightly packed | Hanging arrangement or excessive crowding |
| Items disappear behind other items | Visibility and access |
| Folded clothes mix together | Shelf organization |
| Doors conceal part of the closet | Doorway and side-space access |
| Bins interfere with hanging clothes | Floor-level clearance |
| Putting things away takes too many steps | Storage routine |
Start with the problem you experience most often.
A shelf divider won’t solve a crowded hanging rod. And another organizer won’t necessarily help if the real issue is that you can’t comfortably reach the storage you already have.
2. Check What Your Closet Actually Needs to Hold
Before changing the layout, review your belongings.
Separate shorter and longer hanging garments, items that can be folded, accessories, and occasional-use belongings.
You don’t have to discard clothes you want to keep. You’re trying to understand the kind of storage they need.
Pay attention to garment length. A closet holding mostly shirts may offer different hanging options from one holding long coats and dresses.
Also check whether everyday items occupy the easiest-to-reach locations.
Try this first: Move frequently used belongings into convenient existing spaces and place appropriate occasional items elsewhere.
If the closet becomes easier to use, you may not need another organizer.
3. Measure the Space You Can Actually Use
An organizer may fit inside your closet but still be difficult to reach or remove.
Check these areas before comparing products.
| Check | What to record |
|---|---|
| Interior space | Usable width, depth, height, and obstructions |
| Door opening | Clear access with doors in their normal open positions |
| Hanging zone | Rod position, garment lengths, and vertical clearance |
| Shelves | Depth, width, vertical clearance, thickness, and material |
| Floor zone | Space below garments and the path needed to remove containers |
| Comfortable reach | Locations you can use without awkward handling |
Pay Attention to the Doors
Sliding-door panels may conceal some storage. Bifold and hinged doors can create different clearance problems.
Measure the area you can actually access, not just the total interior width.
For established closet-planning principles, including garment measurements and door-opening considerations, see This Old House’s bedroom closet planning guide:
www.thisoldhouse.com/closets/read-this-before-you-redo-your-bedroom-closet
Keep your measurements available for the product comparisons in Section 5.
Remember: Physical fit alone doesn’t establish safe installation or convenient use.
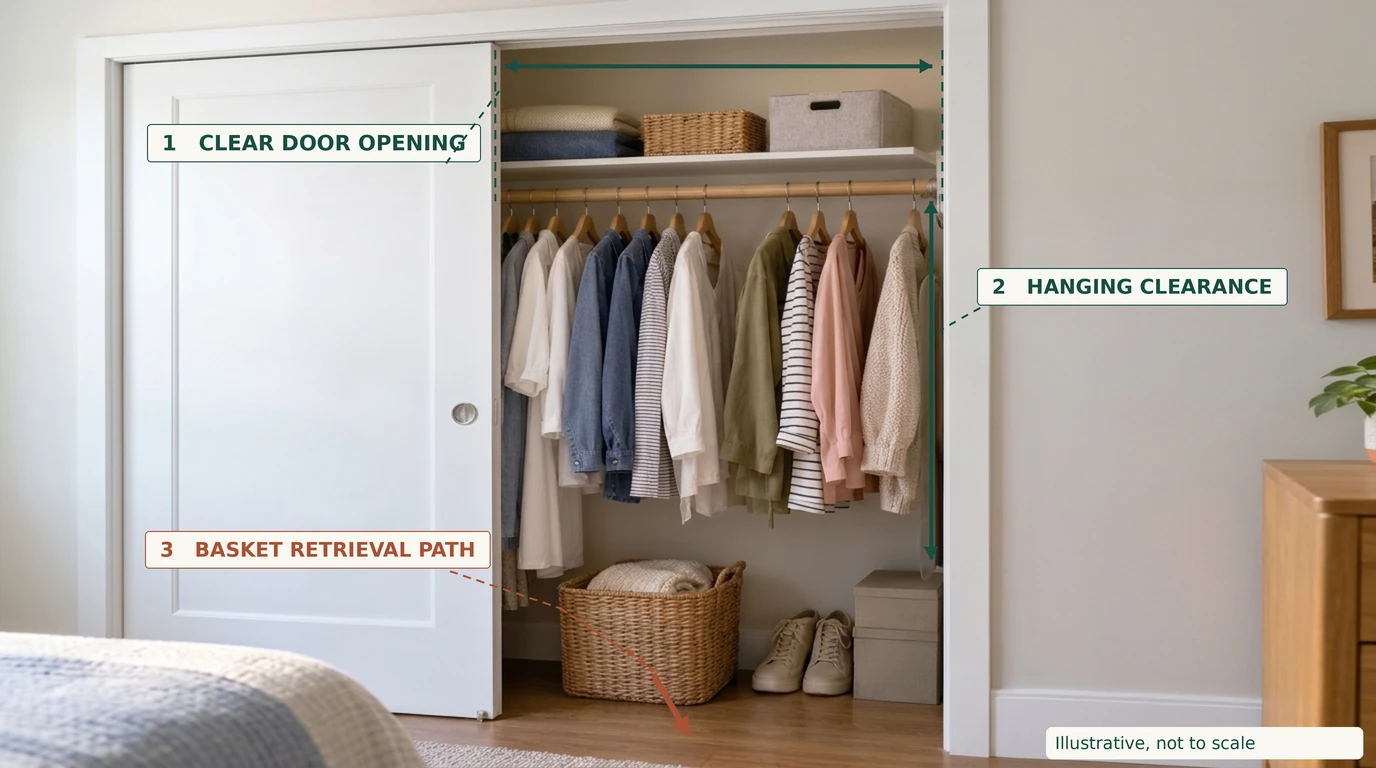
Annotated closet photo guide: This is one photograph, not separate top and front diagrams. If the labels inside the photograph are too small to read on your device, use the full-size image link or the text below.
- Clear doorway access: Check the space you can actually reach when the sliding doors are open. Overlapping door panels and side returns may conceal storage even when the closet interior is wider.
- Hanging clearance: Check the free space below hanging garments before placing storage beneath them.
- Basket retrieval path: Make sure you can remove a floor basket through the usable doorway without blocking clothes or other storage.
Open the full-size annotated closet photograph to examine its visual labels. Illustrative only, not to scale. Measure your own closet and verify installation supports separately.
4. Try These No-Buy Changes First
Before adding storage, see whether a better arrangement solves the problem.
| Try this | When it may help |
|---|---|
| Move everyday clothes into easier-to-reach positions | Frequently used items are hidden or inconvenient |
| Fold suitable garments instead of hanging them | The existing rod is crowded |
| Regroup items on existing shelves | Categories mix together or become difficult to find |
| Remove unnecessary obstacles | Containers or misplaced items block useful space |
Consider the fabric-care requirements of garments before changing how they’re stored.
Don’t move heavy belongings into inconvenient locations simply to free space elsewhere.
If the no-buy arrangement works, stop there. There’s no prize for buying an organizer you don’t need.
5. Choose a Storage Change That Solves Your Problem
If the closet still doesn’t work, compare storage options against your measurements and everyday routine.
An organizer should solve a specific problem without introducing a new one.
Example: Three Decisions in One Small Closet
This is an illustrative example, not a real OrganizeSmartly installation or product test.
Imagine a reach-in closet with sliding doors, crowded hanging clothes, and folded items on a wire shelf.
Some frequently worn shirts are difficult to reach because they sit behind part of the doorway.
Decision 1 — Accept a no-buy change.
The reader rearranges the shirts into the most accessible hanging area. Suppose this makes them easier to find and return.
Result: Accept. The problem improves without buying anything.
Decision 2 — Reject incompatible dividers.
The reader considers clip-on acrylic dividers designed for certain solid shelves. But the existing shelf is wire.
Result: Reject those dividers. The shelf doesn’t match the proposed product’s intended fit.
Decision 3 — Hold an additional hanging rod.
The reader considers a second hanging level but cannot establish whether the existing rod and brackets can support the proposed arrangement.
Result: Hold. Installation should not proceed until compatibility and support suitability can be established.
The lesson is simple: sometimes you rearrange, sometimes you reject a product, and sometimes you need more information.
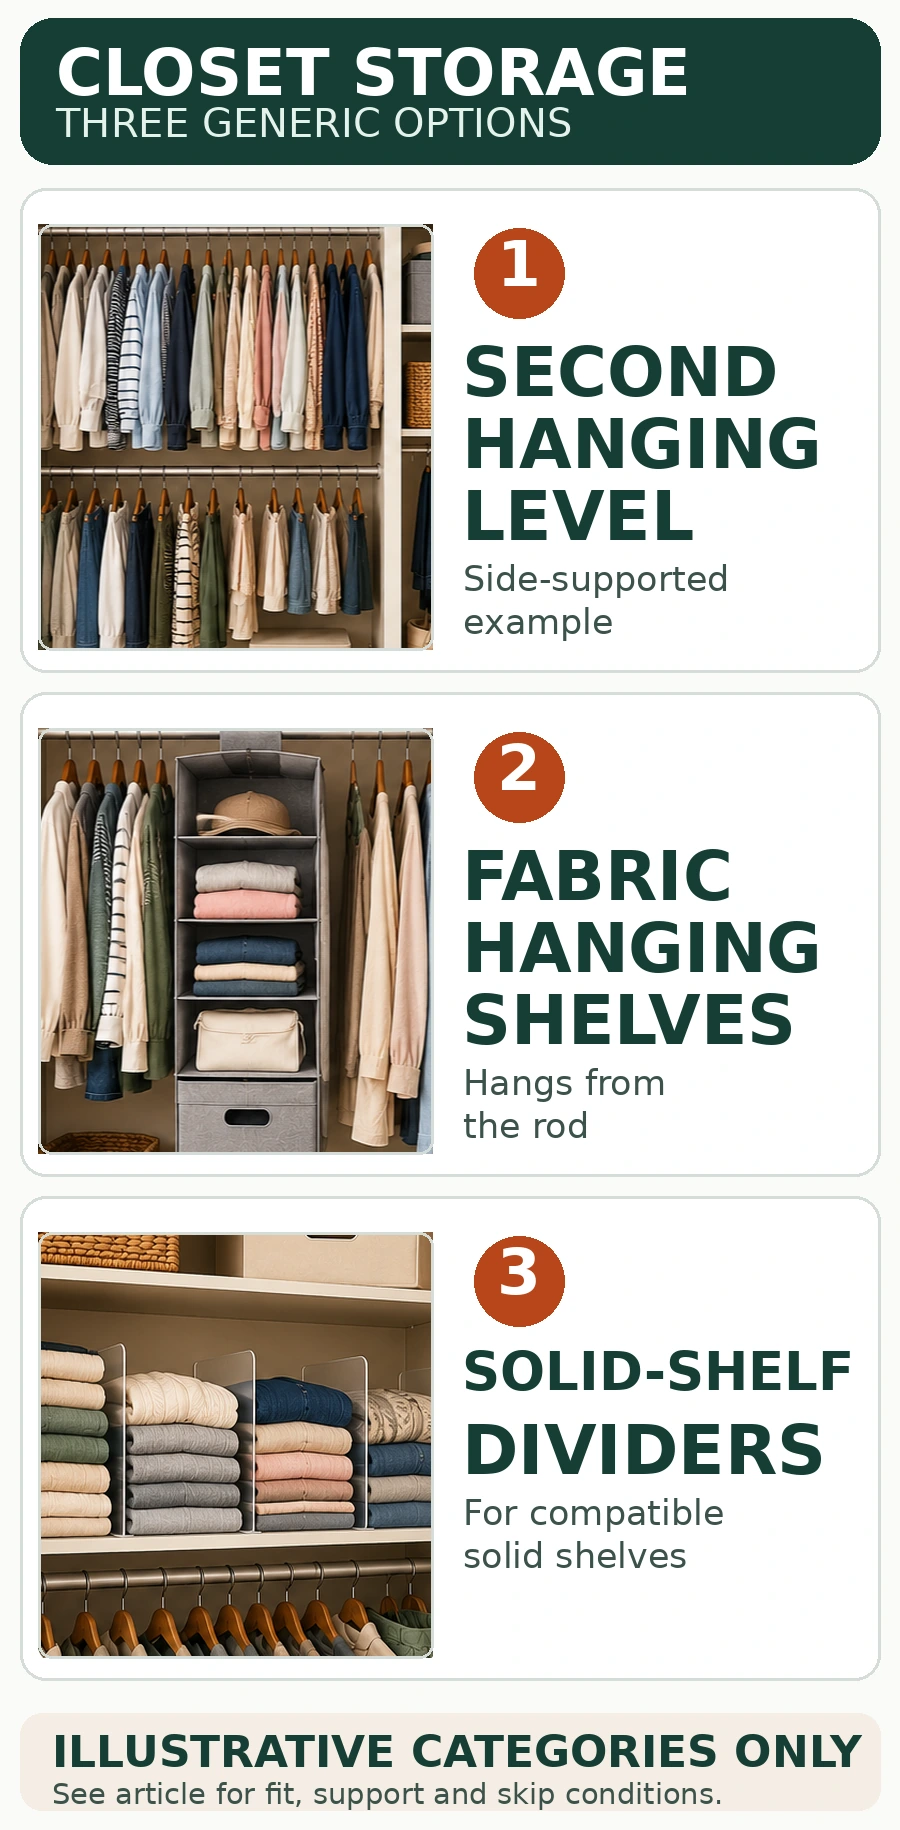
Generic storage categories only. The illustrated second hanging level uses side supports, not the suspended Simple Houseware B01K07MY1K or an installation guide. Check the exact product and closet supports before buying or installing.
A. Adjustable Second Hanging Level
A second hanging level may help when a closet has many shorter garments and insufficient practical rod space.
Some accessories suspend an additional rod from an existing closet rod.
Measure First: Check available hanging width, garment lengths, vertical clearance, attachment compatibility, and the existing support system.
Best For: Compatible closets with mostly shorter hanging garments and enough clearance for two usable levels.
Skip If: Long clothes interfere, lower garments become harder to reach, attachments don’t fit, or existing support suitability cannot be established.
An additional rod does not automatically double usable storage capacity. It also doesn’t establish that your existing hardware can safely carry more weight.
If support conditions are uncertain, don’t increase loading.
Bedroom
Simple Houseware Adjustable Closet Hanging Rod — Chrome
Adjustable lower hanging level for shorter garments. Confirm existing rod support and clearance before use.
Check on Amazon (opens in a new tab)B. Hanging Fabric Shelves
Fabric hanging organizers can provide compartments for suitable folded clothes.
The trade-off? They occupy some of the hanging space you already have.
Measure First: Check the organizer’s complete installed width, depth, and height, including hooks. Compare these with available rod space and hanging clearance.
Best For: Compatible closets with available hanging space and folded items that would benefit from accessible compartments.
Skip If: The organizer displaces necessary hanging clothes, obstructs longer garments, becomes difficult to reach, or cannot be supported appropriately.
When comparing hanging organizers, consider the full installed dimensions rather than simply counting compartments.
A shorter organizer may preserve more space underneath. A taller design may have different compartment proportions. Neither is automatically the better option.
If your existing shelves work after rearranging them, that may be the simpler choice.
Bedroom
Simple Houseware 6 Shelf Hanging Closet Organizer — Gray
Six hanging fabric compartments with side pockets. Measure full installed hanging height including hooks.
Check on Amazon (opens in a new tab)C. Clip-On Shelf Dividers
Shelf dividers may help when folded clothes mix together on existing shelves.
They separate storage areas rather than creating new shelf capacity.
Measure First: Check shelf thickness, material, edge shape, depth, and available vertical clearance against the exact divider’s instructions.
Best For: Compatible solid shelves where simple separation would make items easier to organize.
Skip If: The shelf is incompatible, the clips may damage the finish, or the divider interferes with access.
Don’t assume a clip-on divider intended for solid shelves works on wire shelving.
And don’t treat dividers as a solution for an overloaded shelf.
Bedroom
CY craft Clear Acrylic Shelf Dividers — 2 Pieces
Two clear clip-on dividers for compatible solid shelves. Check shelf thickness and clip fit.
Check on Amazon (opens in a new tab)D. Over-Door Storage
An organizer on a suitable closet door may provide additional space for accessories.
However, compatibility depends on the exact door design.
Measure First: Check door type, thickness, top clearance, hardware, movement, and the organizer’s installed dimensions.
Best For: Compatible doors where the organizer can be used without interfering with normal operation.
Skip If: It prevents proper closure, interferes with hinges or tracks, or has uncertain compatibility.
An organizer made for a conventional hinged door shouldn’t automatically be considered suitable for sliding or bifold doors.
E. Floor-Level Storage
The area beneath hanging clothes may accommodate appropriate storage containers.
Measure First: Check floor space, hanging clearance, container dimensions, and the space required to retrieve the contents.
Best For: Suitable belongings that can remain accessible without disturbing other storage.
Skip If: Containers block hanging clothes, require repeatedly moving other items, or make retrieval uncomfortable.
Before buying another bin, consider rearranging what is already on the floor.
6. Check Installation, Support, and Renter Restrictions
An organizer that fits physically isn’t necessarily suitable for installation.
Before adding hardware or increasing loading, consult the instructions for the exact product and assess the existing installation.
An accessory’s advertised capacity does not establish that the closet rod, brackets, fasteners, shelves, or wall can support the completed arrangement.
Different hardware and supporting surfaces may require different installation methods. For general examples, see ClosetMaid’s installation guidance:
homedepot.closetmaid.com/en-US/Installation/Pages/how-to-guides.aspx
These instructions do not certify unrelated accessories.
When to Stop
Do not proceed with increased loading or installation if existing hardware is loose or damaged, attachment compatibility is uncertain, or required installation conditions cannot be established.
Seek applicable manufacturer documentation or qualified installation assessment rather than guessing or improvising a load test.
Renter Considerations
No-drill, removable, and damage-free are not interchangeable.
Some adhesives have specific surface, application, loading, and removal requirements. See 3M Command’s official FAQ for examples of restrictions that can apply to adhesive products:
www.command.com/3M/en_US/command/contact-us/faqs/
Check rental permissions before making modifications.
Finally, consider your own comfortable reach and handling needs. Maximizing storage height is not always helpful if frequently used belongings become difficult to access.
7. Check Whether the Arrangement Works
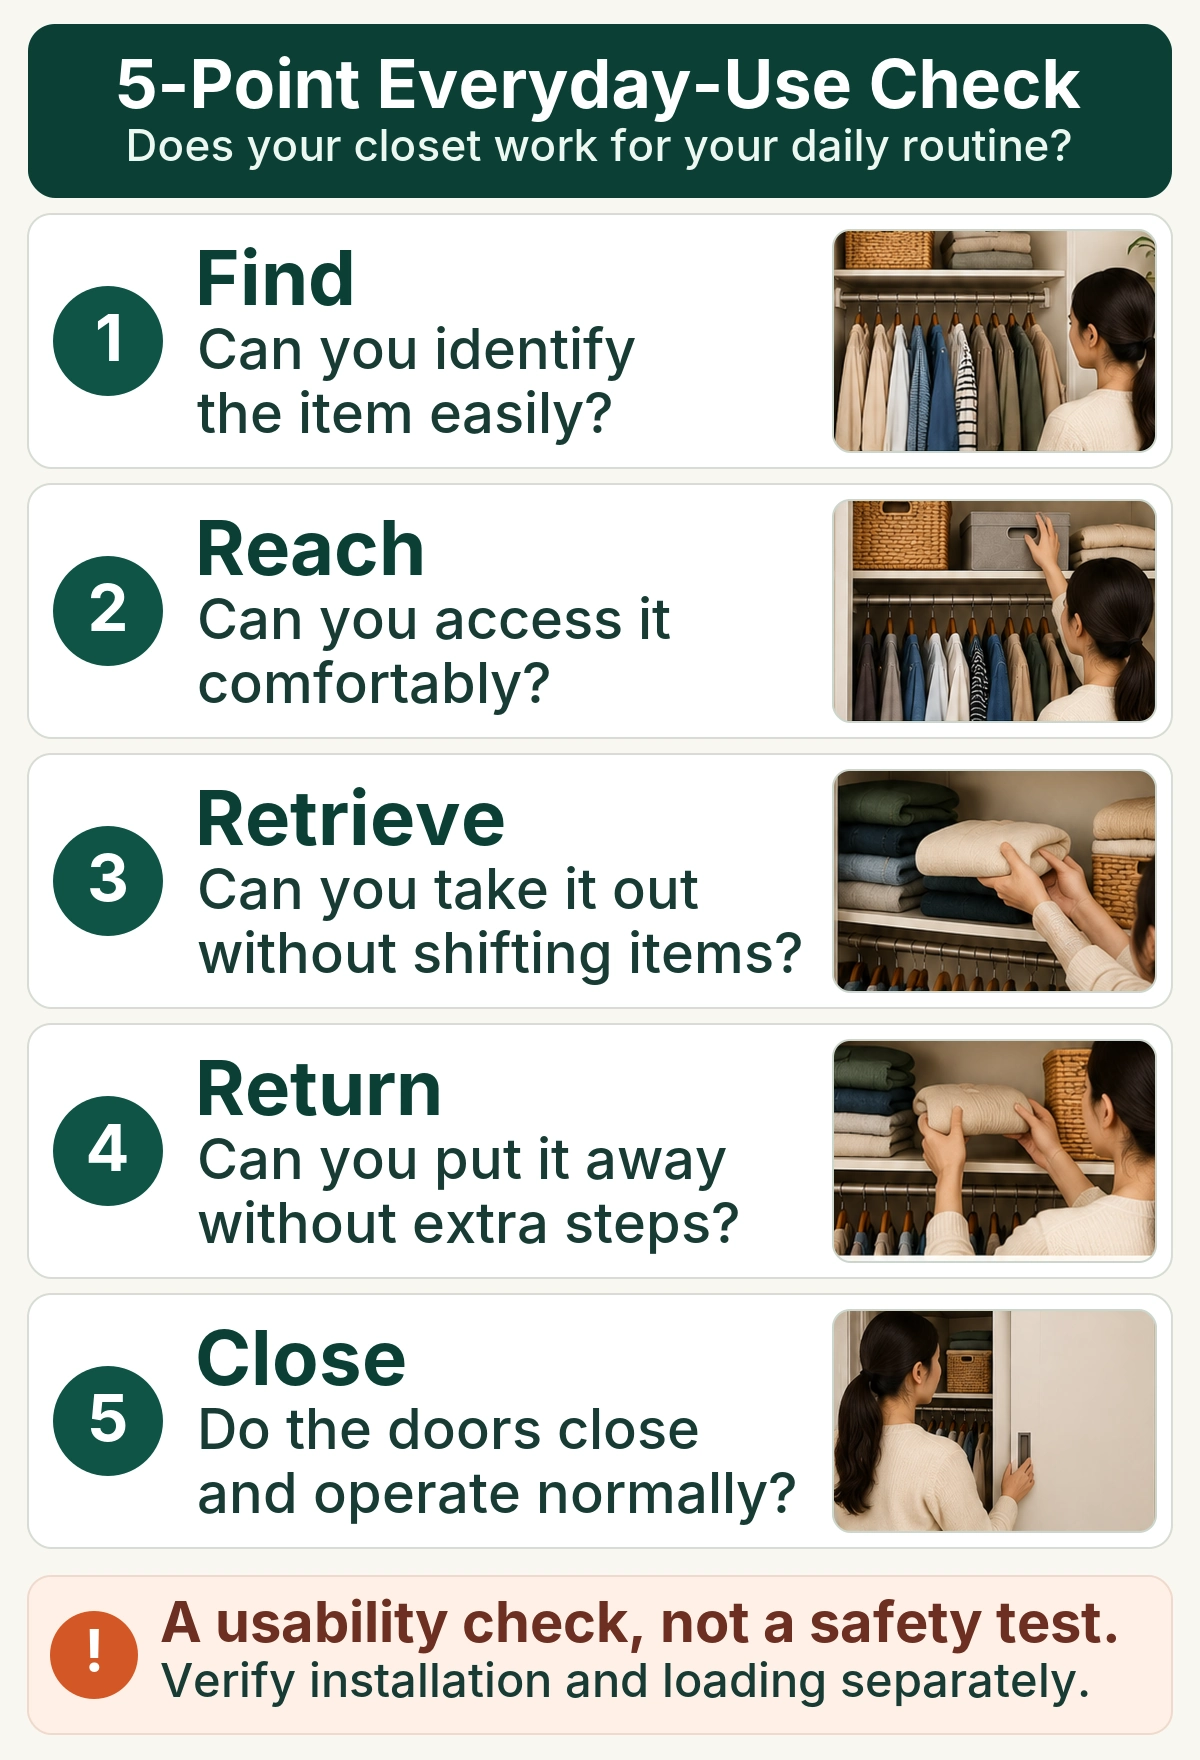
After rearranging the closet, use this simple five-point check.
It’s a reader self-assessment, not a certified safety, accessibility, or product-performance test.
| Check | Question |
|---|---|
| Find | Can I identify the item easily? |
| Reach | Can I access it comfortably? |
| Retrieve | Can I remove it without routinely moving unrelated storage? |
| Return | Can I put it away without unnecessary steps? |
| Close | Can the closet doors and hardware operate normally? |
If something fails, reconsider that part of the arrangement.
A container may fit on a shelf but be awkward to remove. A hanging organizer may create compartments while blocking other clothes.
Passing these five checks does not prove structural safety. Installation compatibility and support still need separate verification.
8. Keep What Works
A practical closet doesn’t need a complicated maintenance routine.
Keep frequently used belongings in predictable, accessible locations. If something repeatedly ends up out of place, consider whether its assigned storage location is too inconvenient.
When the closet becomes frustrating again, identify the specific problem before buying something new.
If your bedroom has no built-in closet, you’ll need a different storage-planning approach involving room layout and suitable freestanding systems.
For an existing reach-in closet, start with the space you already have.
The best small-closet arrangement isn’t necessarily the one that holds the most. It’s the one that fits your belongings, respects the closet’s limits, and makes everyday use easier.
Keep Building a Home That Fits
Explore practical organization guides built around real measurements, everyday routines, and usable space.