How to Organize Kitchen Cabinets in a Small Kitchen
If you are figuring out how to organize kitchen cabinets in a small kitchen, the goal is not to fit as much as physically possible behind every door.
A cabinet can be completely full and still be frustrating to use if everyday dishes are buried, cookware has to be unstacked piece by piece, or half the shelf height goes unused.
A better way to organize kitchen cabinets in a small kitchen is to work in this order:
- Decide what deserves cabinet space.
- Group items by how and how often you use them.
- Give the easiest locations to the things you reach for most.
- Fix specific vertical, deep, or awkward-space problems.
- Measure before buying organizers.
In other words, organize by access, frequency, and cabinet geometry before buying storage products.
If your problem extends beyond the cabinets themselves, our broader guide to small kitchen organization ideas covers counters, walls, carts, and other parts of the kitchen. Here, we are staying inside the cabinets.
Quick Navigation
Affiliate Disclosure: OrganizeSmartly may earn a commission from qualifying purchases made through affiliate links, at no extra cost to you. We only recommend products that fit the specific storage problem discussed.
Start With a Cabinet Audit Before Buying Organizers
It is tempting to start by shopping for bins, risers, and turntables. Start with the contents instead.
Otherwise, you can end up buying an organizer for a problem that would have disappeared after removing three things you never use.
Empty one cabinet zone at a time
You do not need to empty the entire kitchen at once.
Start with one cabinet or one related group, such as dishes and drinkware, cookware, food-storage containers, baking supplies, or frequently used ingredients.
Take everything out and look at both the contents and the cabinet itself. Notice shelf spacing, usable depth, hinges, door clearance, awkward corners, areas you cannot see or reach easily, and empty vertical space above short items.
You are trying to identify why the cabinet is difficult to use before deciding how to fix it.
Remove duplicates and low-use items
Small cabinets cannot give everything premium space.
Set aside items that are broken or incomplete, unnecessary duplicates, rarely used, or stored in the kitchen mainly because they have always been there.
You do not have to get rid of every occasional-use item. But a serving platter used a few times a year does not need the same access as the plate you use every morning.
Group items by how often you use them
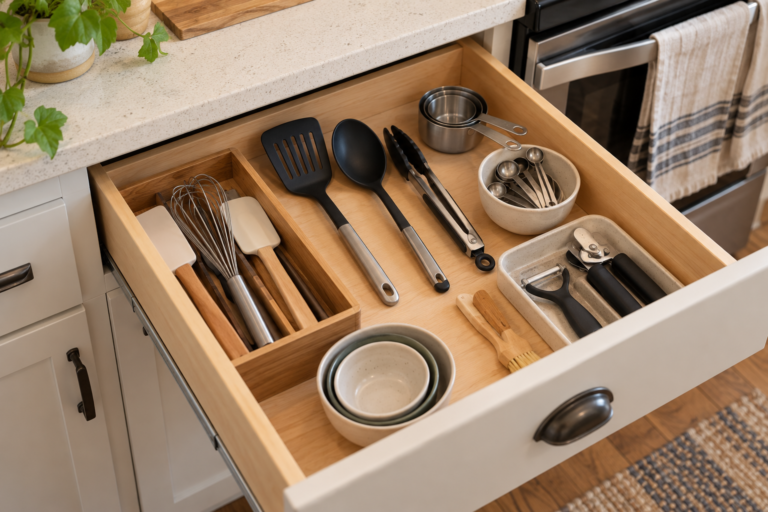
- Daily: plates, bowls, mugs, glasses, frequently used cookware
- Weekly: mixing bowls, baking dishes, food-storage containers
- Occasional: specialty cookware, serving pieces, holiday items
Keep the highest-use items in the most accessible cabinet locations. That single change can make a cabinet easier to use without adding anything to it.
Create Zones Based on How You Use the Kitchen
Once you know what stays, assign cabinets by function.
A zone keeps related items together and, where the layout allows, close to where you use them.
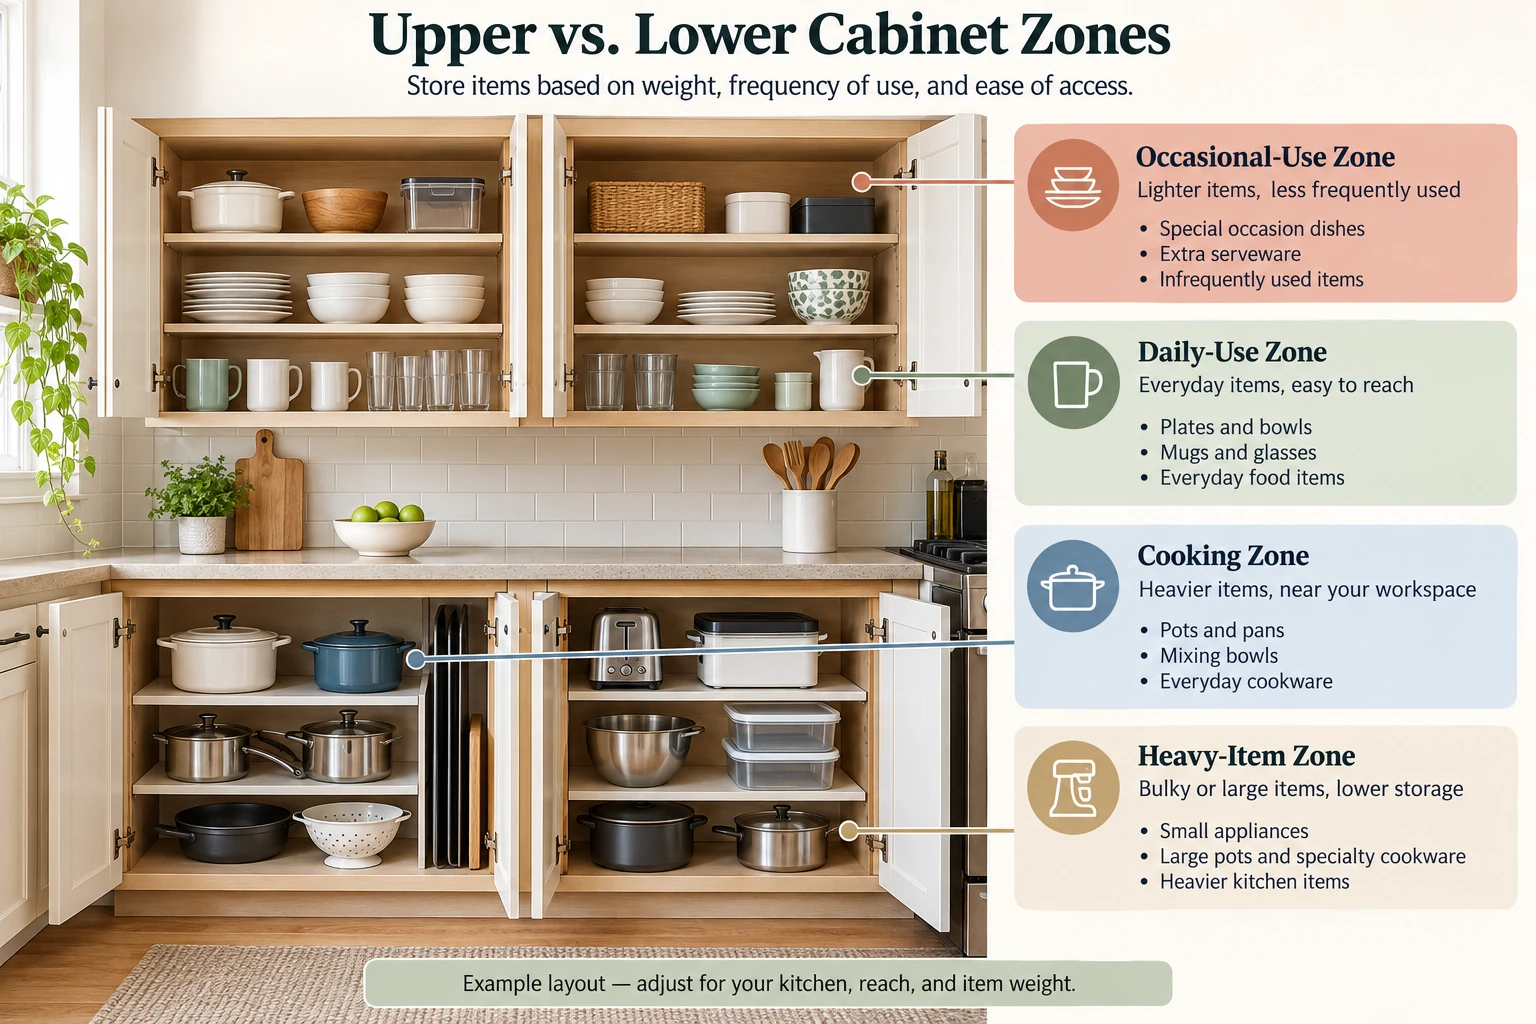
Daily-use zone
Use an accessible cabinet for things you reach for constantly, such as dinner plates, bowls, mugs, drinking glasses, and small plates.
The exact cabinet matters less than consistency. The items should be easy to find, easy to return, and not blocked by lower-priority pieces.
Cooking zone
Group frequently used cookware around the cooking area when your layout makes that practical. That might include pots and pans, mixing bowls, baking dishes, and cooking-related accessories.
Do not force an entire category into one cabinet if doing so makes retrieval worse. The useful question is not “Can everything fit here?” It is “Can I remove the item I need without unloading everything in front of it?”
Heavy-item zone
Heavier cookware and appliances are often better candidates for lower storage than high shelves, provided the cabinet dimensions and your own needs make that arrangement practical.
This may include pots, pans, larger mixing bowls, heavier serving pieces, and compact appliances you genuinely use.
This is a placement principle, not a universal rule. Your kitchen layout and what you can comfortably handle matter more than following a perfect-looking cabinet diagram.
Occasional-use zone
Less-accessible cabinet space is still useful.
Higher shelves, deep areas, or awkward corners can hold things you use less often, provided the items can be stored securely and retrieved without creating unstable piles.
Decide What Belongs in Upper vs. Lower Cabinets
There is no single correct arrangement for every kitchen.
Instead, match the cabinet location to the item’s weight, frequency of use, and ease of retrieval.
Upper cabinets
Upper cabinets can work well for lighter, frequently used items such as plates, bowls, mugs, glasses, and lightweight food-storage pieces.
Use the easiest-to-reach shelves for everyday items. Reserve less-convenient shelves for lighter things you use less frequently.
Lower cabinets
Lower cabinets often make sense for larger or heavier items such as pots and pans, larger mixing bowls, cookware, and frequently used compact appliances.
But lower cabinets can also become frustrating if deep shelves turn into piles you have to dismantle.
Placement alone does not solve access. The next step is making the interior easier to use.
Use Vertical Space Before Adding More Storage
A cabinet may look full because the shelf surface is crowded even though there is unused height above it.
Before searching for another place to store things, look upward inside the cabinet.
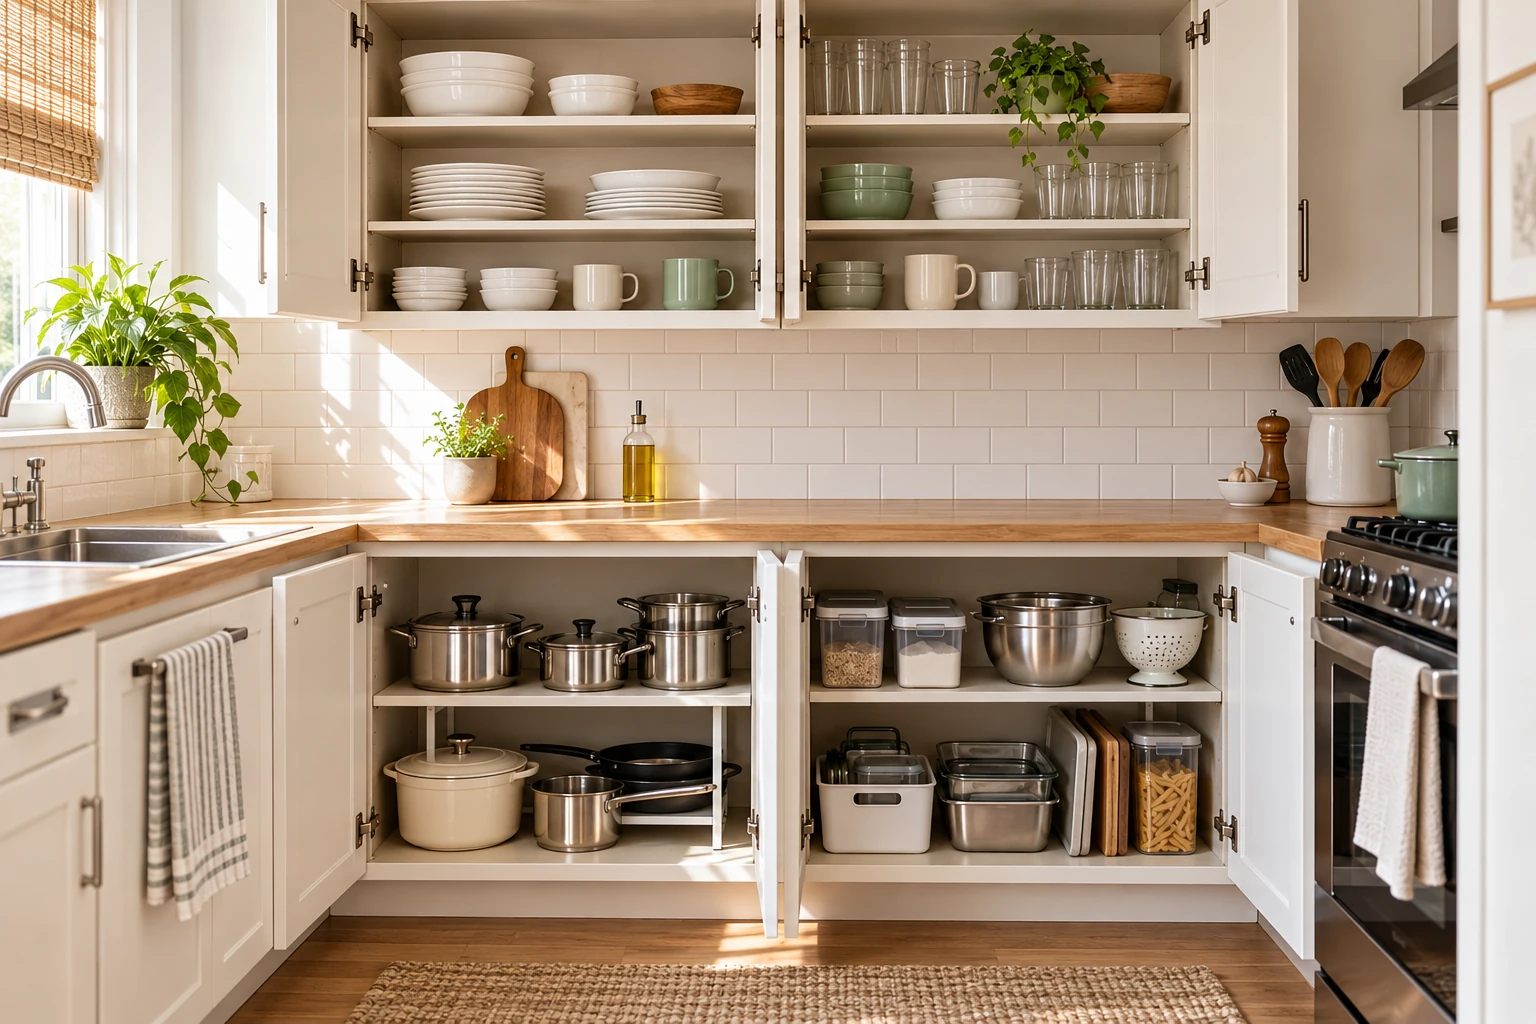
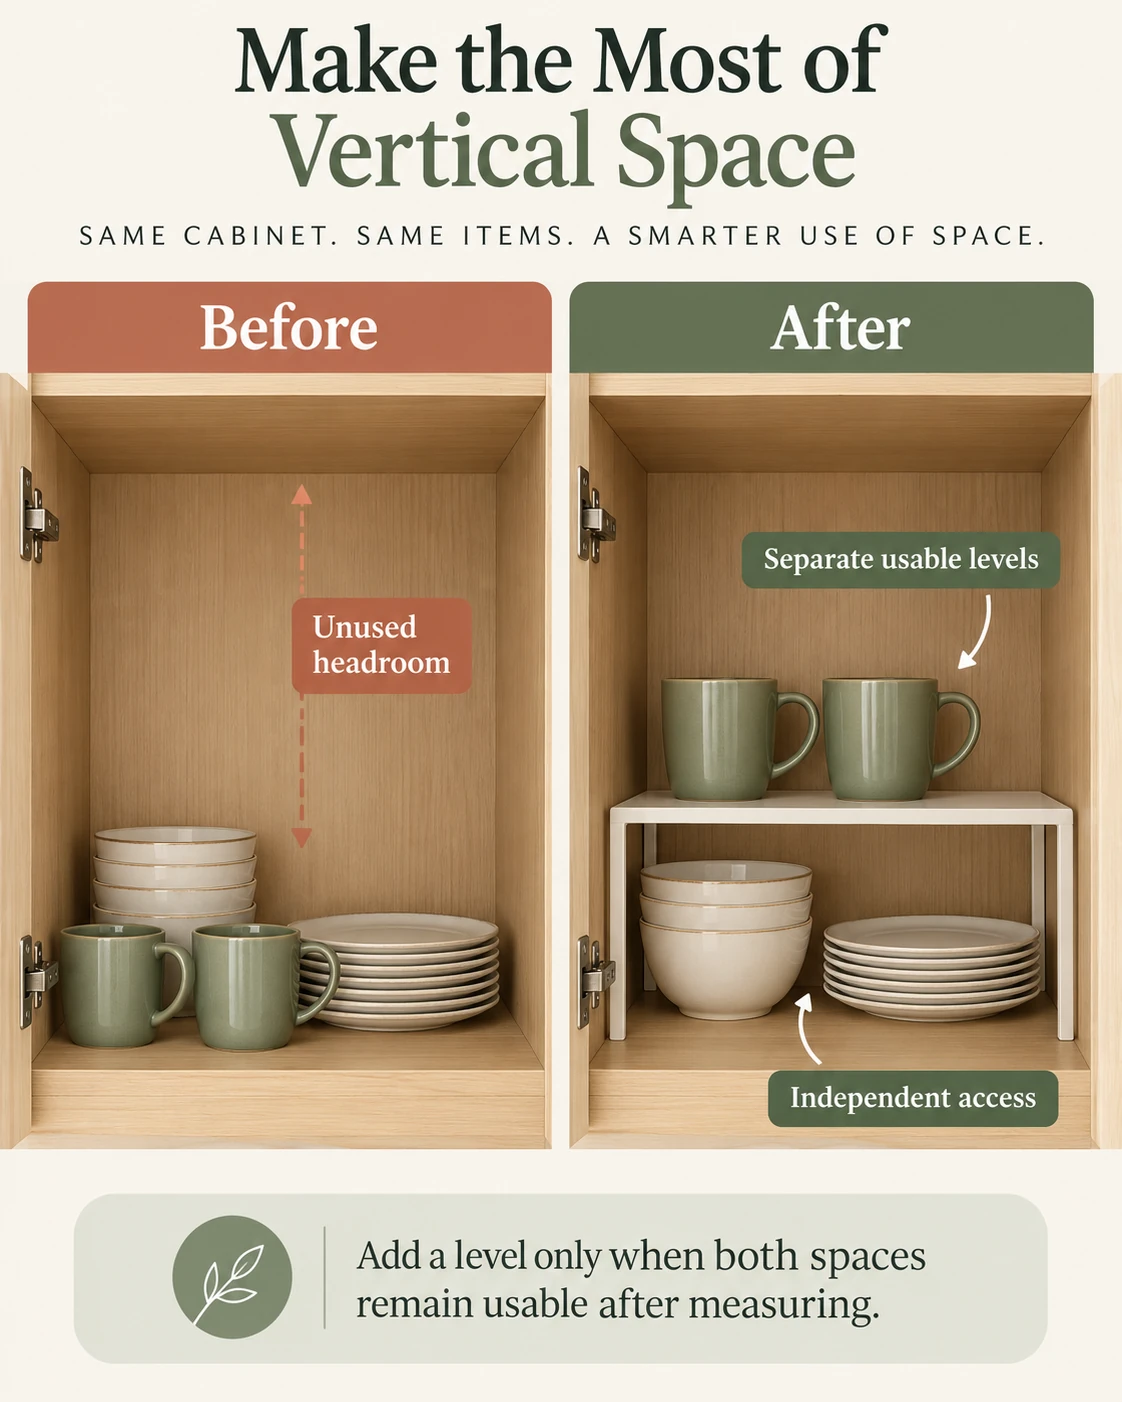
Add a shelf riser when there is usable headroom
A shelf riser can divide a tall shelf into two shorter storage levels. This can work well for plates, bowls, mugs, short dishes, and small containers.
But measure first. A riser only helps when both the upper and lower levels remain easy to use after it is added.
Keep stacks shallow
Stacking saves space until accessing the bottom item means rebuilding the entire stack.
Try to keep like items together in manageable layers.
For example, several similar bowls may stack neatly. Combining dinner plates, salad plates, bowls, and serving pieces into one tall tower is more likely to create daily friction.
Separate frequently used categories
If you repeatedly lift one category to reach another, consider separating the two levels with a correctly sized riser or divider.
The goal is not maximum density. It is independent access.
Measure First: Check the cabinet opening width, interior width, shelf depth, and available height. Make sure the items you plan to store remain easy to remove after the organizer is in place.
Best For: Cabinets with obvious unused headroom above mugs, dishes, wraps, small boxes, or similar short items.
Skip If: The cabinet is already short, your items are tall, or adding another level would make either shelf difficult to use.
Installation / renter note: Freestanding. No drilling, screws, or adhesive.
Kitchen
YouCopia UpSpace Adjustable Box/Cabinet Organizer
A compact adjustable organizer that can divide tall cabinet space into more usable levels without permanent mounting.
Check on Amazon (opens in a new tab)(paid link)
Stop Deep Cabinets From Becoming Storage Black Holes
Deep cabinets provide useful volume, but that volume becomes less helpful when everything at the back disappears behind everything at the front.
Treat depth as an access problem.
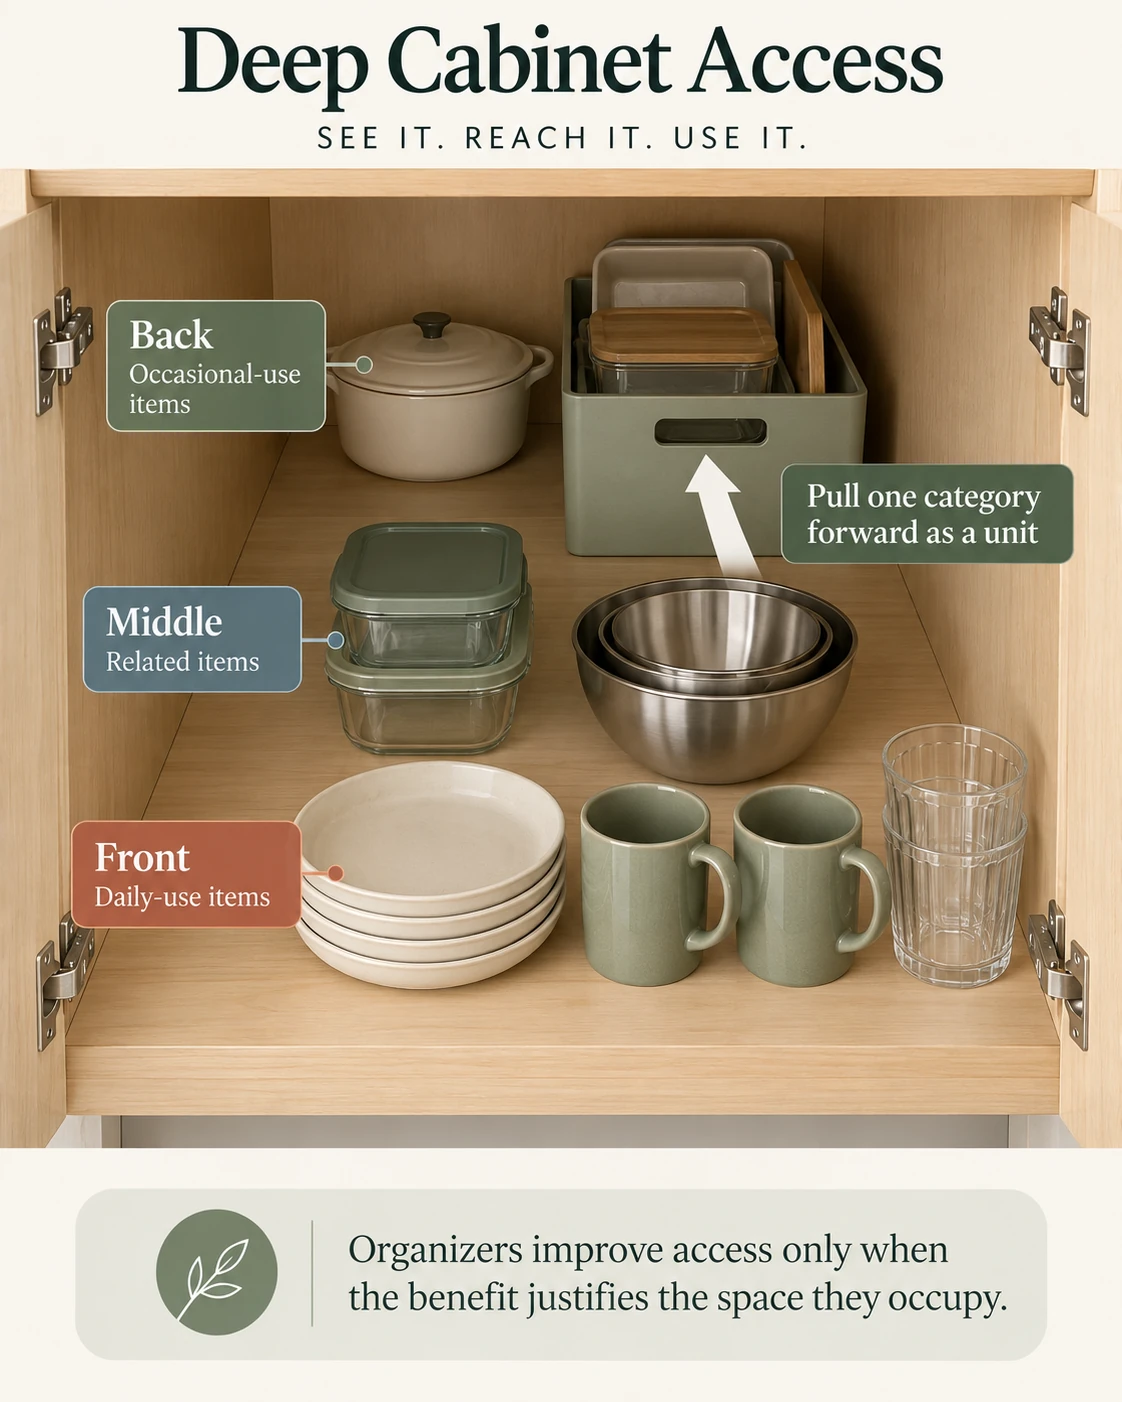
Keep frequently used items toward the front
The front of a deep shelf is premium space. Give it to items you use regularly.
Store less-frequently used items farther back, ideally in related groups rather than as loose objects scattered behind everyday items.
Use containers that pull forward as one unit
For smaller related items, a handled bin can turn the back of the cabinet into accessible storage.
Instead of reaching around several loose objects, you pull out one group.
This works best when the container solves a defined category problem rather than simply concealing miscellaneous clutter.
Use turntables or pull-outs selectively
A turntable can make small items easier to reach in a deep or awkward area. A pull-out organizer can bring the contents of a deeper cabinet forward.
Neither solution automatically increases usable capacity. The organizer itself takes up space, so use one only when it improves access enough to justify its footprint.
Measure First: Check the cabinet opening width, shelf depth, and the height of the items you plan to store. Leave enough front clearance to grip the handle.
Best For: Packets, baking supplies, small packaged foods, or other lightweight categories that tend to migrate toward the back.
Skip If: You need airtight storage, your cabinet is shallower than the bin, or the items you want to store are too tall for a shallow container.
Installation / renter note: Freestanding. No hardware, drilling, or adhesive.
Kitchen
mDesign Kitchen Cabinet and Pantry Storage Organizer Bins, Shallow Clear 4-Pack
A clear shallow bin with built-in handles that makes lightweight categories easier to pull forward from deeper cabinet shelves.
Check on Amazon (opens in a new tab)(paid link)
Make Awkward Corner Cabinets Easier to Use
Corner cabinets can have considerable internal volume while still being inconvenient to access.
Do not treat every inch as equally valuable.
Keep more frequently used items closer to the opening. Reserve harder-to-reach sections for items you need less often.
Depending on the cabinet’s dimensions and shape, possible solutions include a correctly sized turntable, grouped bins, contained categories, or compatible pull-out hardware.
Avoid building tall, unstable piles simply because the cabinet has extra height.
If retrieving one piece causes several others to shift, the cabinet is storing more than it can conveniently serve.
Organize Containers and Lids Separately
Food-storage containers are much easier to manage when the bases and lids each have a clear system.
Nest similar containers
Nesting compatible containers can reduce the amount of shelf area they occupy.
Keep the stacks shallow enough that removing one container does not require dismantling the entire group.
During your cabinet audit, check for lids or bases that no longer have a useful match.
Store lids vertically when practical
Instead of stacking lids horizontally, consider keeping them upright in a divider or appropriately sized lid organizer.
Vertical storage can make sizes easier to browse and remove individually.
Keep compatible sets together
Store containers near the lids that fit them.
You do not need a complicated labeling system if the contents are already obvious and easy to return.
A system that takes more effort to maintain than the original mess rarely survives very long.
Measure First: Measure the cabinet opening, usable shelf depth, width, and available height. Check whether taller lids will clear the shelf above.
Best For: Food-storage lids that are currently loose, mismatched, or stacked horizontally.
Skip If: Your cabinet opening is too narrow, your lids are unusually tall or oversized, or upright storage would interfere with the shelf above.
Installation / renter note: Freestanding. No drilling, screws, or adhesive.
Kitchen
YouCopia StoraLid Food Container Lid Organizer, Large Classic Edition
An adjustable freestanding lid organizer that keeps food-container lids upright and separated so you can browse them without digging through a stack.
Check on Amazon (opens in a new tab)(paid link)
Measure Before Buying Cabinet Organizers
This is the step most likely to prevent a useless purchase.
Do not measure only the largest visible interior dimension.
Check the actual usable path into and inside the cabinet.
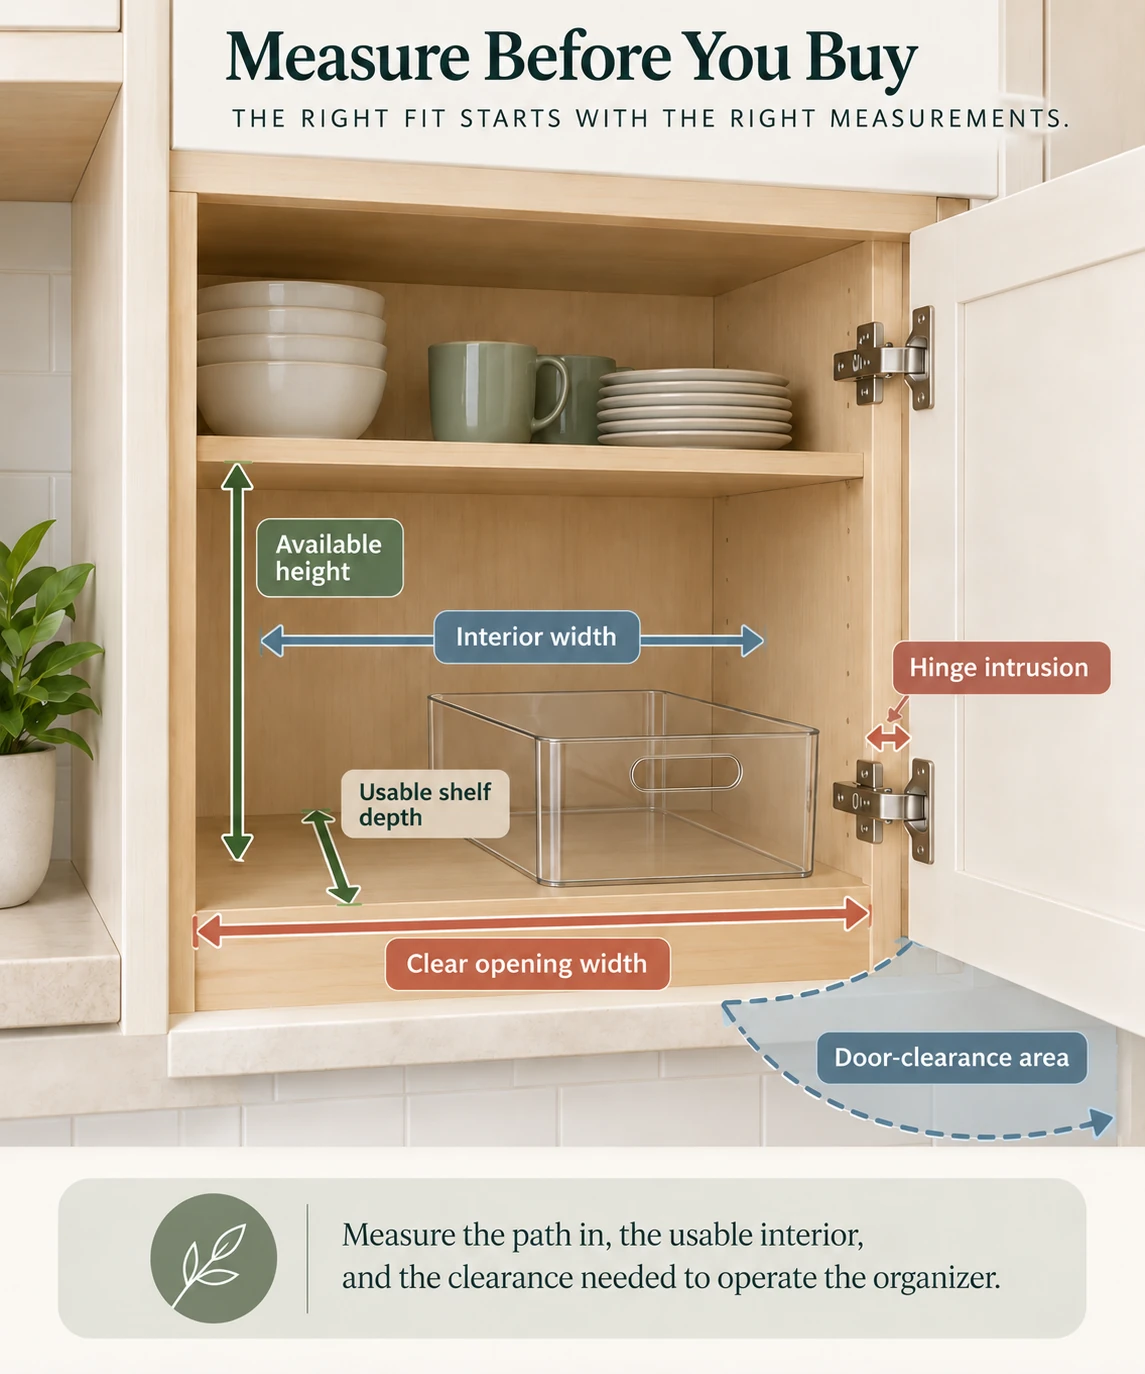
Measure clear cabinet opening width, interior width, usable shelf depth, shelf-to-shelf height, hinge intrusion, door swing and clearance, usable depth toward the back, and fixed frames, lips, pipes, or other obstructions where relevant.
Measure the opening and the interior separately
The widest point inside a cabinet is not necessarily the width available at the opening.
Face frames, hinges, door hardware, or cabinet construction may reduce the clear opening.
An organizer can therefore fit according to the interior dimensions but still be difficult or impossible to insert through the opening.
Check clearance after the organizer is loaded
Do not stop at “the product fits.” Also ask: Can the cabinet door close? Can a pull-out move through its full intended path? Can items be removed from the organizer without hitting the shelf above? Do hinges interfere? Can you actually use the storage once it is full?
For any product with specified installation requirements, load limits, or compatibility rules, follow the manufacturer’s instructions rather than relying on a generic cabinet guideline.
Match the Organizer to the Actual Problem
Instead of asking, “Which cabinet organizer should I buy?” identify the problem first.
Then choose the simplest tool that addresses it.
| Cabinet problem | Possible solution |
|---|---|
| Unused vertical height | Shelf riser or compatible expandable shelf |
| Small items buried in a deep cabinet | Handled pull-forward bin |
| Small items difficult to reach in a corner | Correctly sized turntable |
| Loose container lids | Vertical lid organizer |
| Cookware difficult to separate | Pan or pot organizer |
| Deep shelf with poor retrieval | Compatible pull-out solution |
A product should remove a specific point of friction.
If the cabinet already works after decluttering and rearranging it, you may not need an organizer at all.
Measure First: Check the cabinet opening width, interior depth, usable height, and the height of the pans or lids you plan to store. Allow extra clearance for handles.
Best For: Frying pans, lids, cutting boards, or shallow cookware currently stacked in layers.
Skip If: Your cabinet has limited vertical clearance, unusually deep cookware, or the organizer would interfere with the cabinet door or hinges.
Installation / renter note: Freestanding and tool-free. No drilling or adhesive.
Kitchen
YouCopia StoreMore Adjustable Pan and Lid Rack
A freestanding adjustable rack that stores pans, lids, or similar pieces vertically so individual items are easier to remove.
Check on Amazon (opens in a new tab)(paid link)
Keep Low-Priority Items Out of Prime Cabinet Space
The easiest-to-use cabinet space should go to the items that earn it.
Consider moving lower-priority items away from prime shelves when they include unnecessary duplicates, specialty cookware used infrequently, occasional serving pieces, rarely used appliances, or excessive backup stock.
That does not automatically mean throwing them away.
Some can move higher, deeper, or to appropriate secondary storage.
If food overflow is consuming most of the cabinet system, treat pantry storage as its own project rather than letting it quietly take over every shelf.
For that specific problem, see our guide to organizing a small kitchen without a pantry.
Similarly, do not let this article expand into a full under-sink guide. Plumbing, moisture, pipe clearance, and cleaning-product storage create a separate set of constraints.
That boundary keeps this guide focused on normal cabinet interiors instead of attempting to organize the entire kitchen behind one headline.
Reset One Cabinet at a Time
If the whole kitchen feels overwhelming, work cabinet by cabinet.
- Choose one cabinet.
- Remove its contents.
- Group similar items.
- Remove unnecessary pieces.
- Decide what function the cabinet should serve.
- Return the highest-use items first.
- Place lower-use items in the remaining less-accessible areas.
- Identify any problem that still remains.
- Measure that area.
- Add an organizer only if it solves the remaining problem.
The order matters.
When you organize first and shop second, product selection becomes much more specific.
For renters, storage outside the cabinets may involve additional questions about attachment methods, surfaces, or lease restrictions. Our guide to small apartment kitchen storage ideas for renters covers removable and freestanding approaches in more detail.
FAQs
What is the best way to organize small kitchen cabinets?
Start by removing unnecessary items and grouping what remains by how and how often you use it. Give everyday items the easiest-to-reach locations. Then address specific problems such as unused shelf height, deep storage, or difficult stacks. Measure before adding organizers.
What should go in upper and lower kitchen cabinets?
Upper cabinets often work well for lighter items such as dishes, bowls, mugs, and glasses. Lower cabinets may be more practical for heavier cookware and larger pieces. Your kitchen layout, the weight of the items, frequency of use, and ease of retrieval should determine the final arrangement.
How can I use vertical space inside kitchen cabinets?
Look for genuinely unused height above short stacks or low-profile items. A properly sized shelf riser or divider can create separate levels, provided both remain easy to access.
How do I organize deep kitchen cabinets?
Keep frequently used items toward the front. Group smaller related items in containers that can pull forward together. A turntable or pull-out organizer may help when it improves access and fits the cabinet correctly.
Are shelf risers useful in small kitchen cabinets?
They can be useful when there is unused height between shelves and when dividing that height makes items easier to retrieve. Measure first so the added level does not create two cramped storage areas.
What should I measure before buying cabinet organizers?
Measure the clear cabinet opening, interior width, shelf depth, available height, hinge intrusion, door clearance, and any fixed obstructions. Then compare those measurements with the manufacturer’s published dimensions and installation requirements.
How to Organize Kitchen Cabinets in a Small Kitchen: The Bottom Line
Small kitchen cabinets work better when storage is organized around how the kitchen is actually used.
Start with the contents. Give frequently used items the easiest locations. Use vertical and deep space without making retrieval harder. Keep low-priority items out of prime cabinet areas. Then measure before buying anything designed to change the cabinet’s layout.
The best-organized cabinet is not necessarily the one that holds the most.
It is the one where you can take something out, use it, and put it back without reorganizing everything around it.